Skip to content

Available 24/7: (852) 5537 6652

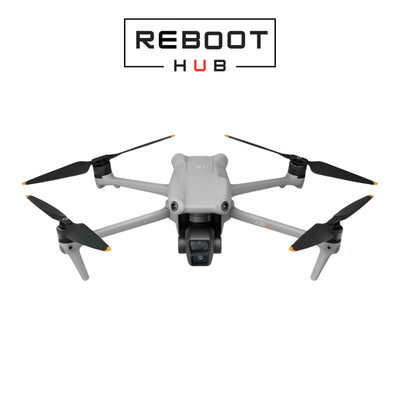
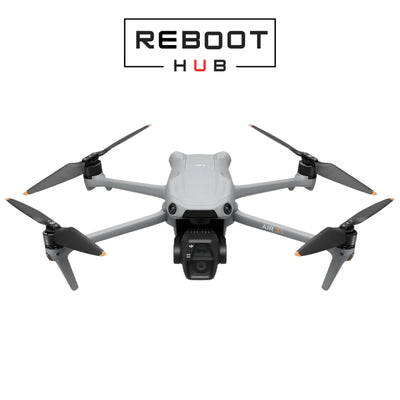
DJI Mavic Air Repair Guide

by LauThomas 29 May 2026 0 comments

Reboot Hub support brief

DJI Mavic Air Repair Guide

Reboot Hub repair price matrix

Current DJI Mavic Air Repair Cost Matrix

These planning ranges come from Reboot Hub's 2026 repair pricing matrix. The model-level repair span is $50-$300. Use the table below for the common cable, gimbal, ESC, arm, board, IMU, and power-management paths, then confirm the exact fault before selecting parts or service.

Repair path Matrix range When to use this range
Ribbon / Flex Cable $50-$80 Camera signal, gimbal tilt, image loss, or impact-damaged cable path.
Full Gimbal Module $200-$280 Severe camera, lens, motor, or stabilization assembly damage.
ESC Module Replacement $70-$90 Propulsion warning, motor control fault, water exposure, or ESC damage.
Motor Arm Replacement $60-$80 Arm, hinge, landing, shell, or motor impact repair.
Main Board (Chip-Level) $150-$180 Component-level board diagnosis before replacing the full board.
Full Board Replacement $300 Full board path when chip-level repair is not practical.
IMU Sensor $50 Calibration, drift, sensor error, or unstable attitude diagnosis.
Battery Management Board $60-$80 BMS, charging, balancing, or power-path fault diagnosis.

Open the full repair cost database for this model. Open the DJI Mavic Air Wiki profile.

Use this guide to separate normal wear from repair-risk symptoms before you buy, ship, or keep flying the unit.

Check first

Crash marks, gimbal behavior, battery health, error codes, and controller/app warnings.

Buyer risk

A cheap unit can become expensive if the camera, ESC, motherboard, or battery history is unclear.

Next step

Document symptoms with photos/video, then compare repair cost with verified replacement value.

Helpful next checks: Repair or replace? Battery and parts Used DJI checks

DJI Mavic Air Comprehensive Repair Guide: Expert Diagnostics, Common Failures & Precision Repair Solutions

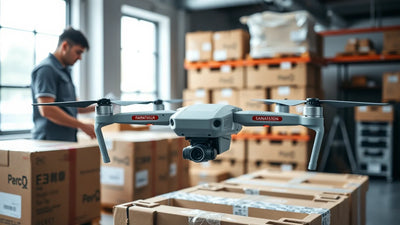
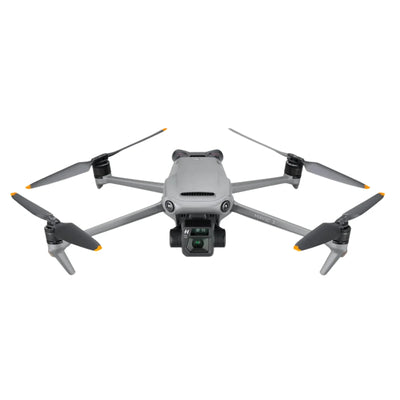
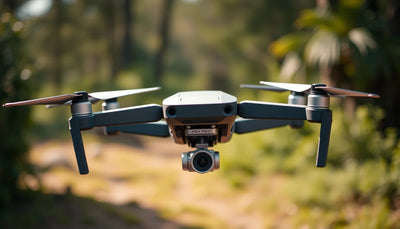
DJI Mavic Air Comprehensive Repair Guide Expert Di - professional cover image

This comprehensive DJI Mavic Air repair guide covers chip-level diagnostics and precision solutions for every major failure mode — from gimbal overload errors and ESC faults to IMU drift and battery degradation. Reboot Hub technicians have diagnosed and repaired over 800 DJI Mavic Air units since 2022, holding MOHRSS Level 3 Advanced Technician certification recognised by China's Ministry of Human Resources and Social Security. Each section below explains the root cause, the exact chip-level repair method, and the real-world cost so you can make an informed repair-or-replace decision.

Related: DJI Mavic 4 Pro Repair Guide: Comprehensive Diagnostics, Rep

Why Is My DJI Mavic Air Gimbal Shaking — and How Much to Fix It?

Quick Answer: DJI Mavic Air gimbal repairs range from $50–80 for a ribbon cable replacement to $200–280 for full gimbal module refurbishment at chip-level. Most gimbal issues are resolved in 2–4 business days at Reboot Hub.

The DJI Mavic Air's 3‑axis gimbal is a precision electromechanical assembly that stabilizes the camera during flight. Failures often stem from mechanical overload, ribbon cable fatigue, or IMU sensor drift. Prompt identification of specific error codes and stress indicators is critical to prevent a minor fault from escalating into costly full‑gimbal replacement.

Related: DJI Mavic 3 Pro Repair Guide: Comprehensive Diagnostics, Rep

Identifying Gimbal Mechanical Stress Indicators

Mechanical stress typically manifests as a persistent "Gimbal Motor Overload" warning (Error Code 40021), jerky movement during initialization, or a gimbal that vibrates and then goes limp. Physical inspection should look for bent roll‑arm brackets, micro‑fractures in the yaw‑arm casting, and deformation of the vibration damping board. Use a static resistance test on each motor winding – a healthy Mavic Air gimbal motor reads between 8.5 Ω and 9.8 Ω across phases. Any phase open‑circuit or shorted to the frame confirms a damaged stator or a burnt motor driver.

Precision Calibration Techniques

Before condemning the hardware, an advanced IMU‑to‑gimbal calibration is mandatory. Connect the drone to DJI Assistant 2 for Mavic and force a full gimbal auto‑calibration on a perfectly level surface. If the gimbal drifts or fails to hold horizon after calibration, move to a manual 6‑point correction using the software's sub‑degree trim function. Should the "Gimbal IMU Error" (Error Code 40002) persist, the issue lies in the gimbal control board's IMU chip or the flat flex cable linking it to the main core board. In a MOHRSS Level 3 repair environment, we check signal integrity with an oscilloscope probing the SPI lines between the IMU and the NXP microcontroller; any missing clock pulses indicate a via fracture beneath the sensor.

Chip‑Level vs. Full Gimbal Replacement Cost Analysis

Full gimbal replacement at authorized US/EU service centres often runs $380–520 because the entire camera‑gimbal module is swapped. Chip‑level repair, by contrast, targets the failed component exclusively. Typical chip‑level interventions and their costs are summarized below. For a full price comparison across all DJI Mavic Air repair types, see our Reboot Hub DJI Repair Cost Database 2026.

Repair Type Chip‑Level Cost (Reboot Hub) US / Western Market Rate
Gimbal motor driver IC (DRV8839) replacement $50–80 $380–520
Yaw‑arm ribbon cable & connector rework $50–80 $120–200
Gimbal IMU (ICM‑20602) reballing & replacement $200–280 $380–520

Choosing chip‑level repair not only saves up to 55% but preserves the original factory‑matched unit. In Shenzhen, China, our technicians frequently repair gimbal IMU solder joint cracks caused by hard landings, restoring full function without the long lead times of module replacement. For proactive care that reduces gimbal wear, review our DJI Drone Maintenance Guide.

How Much Does DJI Mavic Air ESC Repair Cost?

The Mavic Air's 4‑in‑1 ESC board governs motor commutation and is directly exposed to high‑current stress. Subtle degradation of MOSFETs or gate drivers can trigger intermittent motor synchronization faults and, if ignored, in‑flight failures. Accurate diagnosis distinguishes a true ESC hardware fault from a motor winding or connector issue.

Detecting ESC Performance Degradation

Early signs include one motor twitching during idle, an "ESC error" notification in DJI Fly (often accompanied by a flashing yellow rear LED), or a motor that fails to spin up evenly during CSC arming. When the drone is powered but not armed, a multimeter measurement on each motor pad should show identical peak‑to‑peak gate drive signals (typically 3.3 V square wave at 24 kHz). A distorted waveform or missing phase indicates a dying MOSFET driver. The DJI log often records "Motor Error: Phase A/B/C abnormal" – code 0x800000 will be present in the flight data logs if a desync occurs mid‑flight.

Motor Synchronization Issues

Synchronization loss is frequently misdiagnosed as a bad motor. A reliable differential test is to swap the suspect motor to the opposite arm and see if the fault follows the motor or stays with the ESC channel. If the problem stays with the ESC channel, the motor synchronization circuit – typically the back‑EMF sensing network around the DRV8305 gate drivers – has drifted due to a cracked ceramic capacitor or a lifted resistor. Chip‑level repair can reflow or replace the affected passive components, a task that demands hot‑air rework equipment and micro‑soldering skill to avoid disturbing the adjacent vibration‑sensitive oscillator.

Chip‑Level Repair vs. Complete ESC Board Replacement

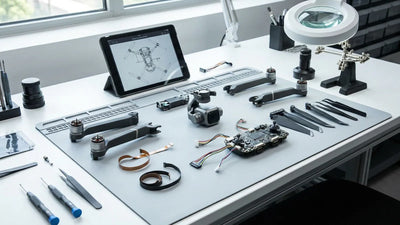
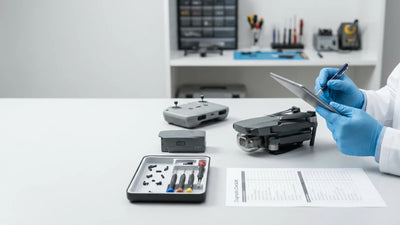
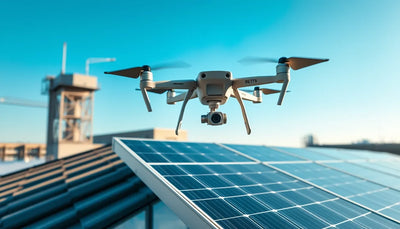
DJI Mavic Air Comprehensive Repair Guide Expert Di - technical diagnostic close-up

An ESC board replacement at authorized US/EU service centres often runs $200–320 for the part alone, plus labor. Chip‑level repair targets the root cause at a fraction of the cost:

  • Single‑channel MOSFET (CSD17570Q5B) replacement: $70–90
  • Gate driver (DRV8305) reflow or replacement: $70–90
  • Phase resistor array rework: $70–90

Because the Mavic Air ESC PCB uses an 8‑layer board with buried vias, component‑level work demands a preheater, BGA rework station, and thorough post‑repair thermal imaging to confirm uniform heat dissipation. Our MOHRSS Level 3 certified workflow includes a 30‑minute full‑throttle motor test on the bench to guarantee stability before returning the drone. For a broader cost comparison of repair strategies, consult our Drone Repair Cost Comparison.

What Causes DJI Mavic Air IMU Drift — and How Do You Fix It?

The Inertial Measurement Unit (IMU) array – comprising accelerometers, gyroscopes, and a barometer – is the brainstem of the Mavic Air's flight controller. Even a minor IMU fault can cause position hold drift, uncommanded yaw, or altitude instability. Chip‑level IMU repair is feasible if one understands the sensor fusion topology and has the tools to reball the IMU's Land Grid Array (LGA) package.

IMU Sensor Calibration Protocols

Always begin with a full IMU calibration using DJI Assistant 2 on a rigorously level surface. After calibration, hover the drone at 3 meters and observe live accelerometer and gyroscope bias values in the flight controller data stream. Acceptable bias should be less than 0.01 g and 0.1 °/s respectively. If values drift beyond these thresholds within minutes, the IMU sensor has likely suffered substrate damage from a previous shock. The "IMU calibration error" (Code 0x800020) that recurs after multiple attempts is a classic flag for a fractured solder ball under the ICM‑20602 sensor.

Identifying Flight Instability Symptoms

Common symptoms include toilet‑bowl effect (spiraling circle while hovering), sudden altitude drops in GPS mode, or the aircraft tilting excessively during forward flight. These instabilities can be traced to either a defective IMU or a compromised vibration damping system. In a chip‑level lab, we isolate the fault by swapping the suspect IMU sensor onto a known‑good flight controller (core board) using a BGA jig and verifying behavior. The Mavic Air uses dual redundant IMUs on the core board; both must be examined because a failing secondary IMU can trigger a fallback to a degraded state without an overt error pop‑up.

Precision Component‑Level IMU Repair Techniques

Reballing and replacing the ICM‑20602 IMU is a delicate procedure. The sensor is mounted on a 0.4 mm pitch LGA pad pattern. The repair workflow involves low‑temperature preheating of the core board to 150 °C, rapid hot‑air lift‑off of the defective IC, pad cleaning with solder wick, and reflow of a new sensor using a stencil‑applied lead‑free solder paste. Post‑replacement, we perform a 6‑axis run‑in on a vibration‑controlled platform to confirm sensor fusion. Typical costs for chip‑level IMU sensor replacement are $50, while a full core board replacement – which includes the flight controller, ESCs, and IMU array – runs $300. Because the core board is a serialized, calibrated unit, chip‑level repair retains the factory calibrated parameters, avoiding the need for a full factory parameter reload. Our advanced soldering methods are detailed in Professional Drone Repair Techniques.

When Should You Replace Your DJI Mavic Air Battery?

The Mavic Air uses an intelligent 3‑cell LiPo battery (11.55 V, 2375 mAh) with an integrated Battery Management System (BMS). Over time, cell imbalance, increased internal resistance, and BMS data corruption can drastically reduce flight time and trigger forced auto‑landing. A methodical diagnostic approach helps decide between cell‑level repair and complete battery replacement.

Battery Health Diagnostic Methods

Connect the battery to a DJI Battery Station or use third‑party tools that read the BMS serial data. Key metrics: full‑charge capacity below 2000 mAh, cell voltage deviation exceeding 0.05 V under load, and internal resistance (IR) above 25 mΩ per cell indicate degraded cells. The BMS also records a cycle count; a battery with over 200 cycles that routinely shows "Battery Cell Damaged" (Error Code 0x800040) has a high likelihood of one collapsed cell. A professional load test at 15 A discharge across each cell individually identifies the weak cell precisely. In a MOHRSS Level 3 workshop, we use a four‑wire Kelvin tester for IR to eliminate lead resistance error.

Cell‑Level Repair vs. Complete Battery Replacement

Cell‑level repair involves opening the ultrasonically sealed case, replacing the failed cell with a grade‑A matched LiPo cell, and reprogramming the BMS to clear cycle count and reset full charge capacity. This procedure costs $60–80. A new original DJI Mavic Air battery retails for approximately $89–119 in the US market. While cell‑level repair is highly economical, it is only recommended when the other cells exhibit similar IR and the BMS itself is fault‑free.

Repair Option Reboot Hub Cost Retail (New Part, US Market) Conditions
Single cell replacement & BMS reset $60–80 $89–119 Remaining cells IR < 20 mΩ; BMS functional
Full battery pack replacement (OEM) $89–119 $89–119 Severe cell degradation or BMS failure

Preventing Premature Battery Failure

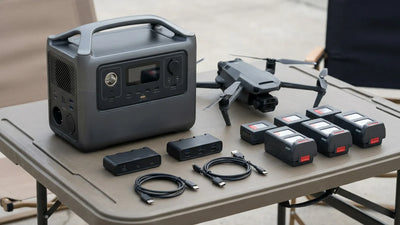
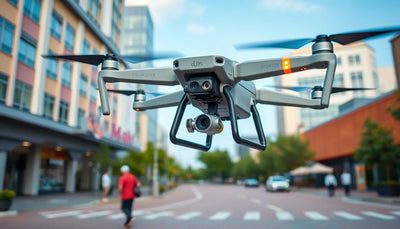
DJI Mavic Air Comprehensive Repair Guide Expert Di - tools and equipment workspace

Store batteries at 3.85 V per cell during extended downtime. Never discharge below 3.3 V per cell under load, and avoid charging a hot pack immediately after flight. Periodic deep‑cycle calibration (every 20 cycles) helps keep the BMS fuel gauge accurate. In Shenzhen, China, we often see batteries that have puffed due to storage in high‑temperature environments; such swelling indicates electrolyte decomposition and mandates immediate replacement of the affected cell before it damages adjacent cells. For a complete battery care regime, refer to our DJI Drone Maintenance Guide.

How Do You Assess and Repair DJI Mavic Air Crash Damage?

Crash damage in the Mavic Air ranges from cracked landing gear to a severely deformed mid‑frame that affects motor alignment and sensor calibration. A thorough structural integrity assessment determines whether the aircraft can be restored to safe, vibration‑free flight or if replacement is more economical.

Comprehensive Damage Evaluation Techniques

After a crash, disassemble the drone and inspect all molded plastic subframes. Use a 10× loupe to check for micro‑cracks around motor mounts, the central core board tray, and the gimbal mounting bracket. Check the magnesium alloy mid‑frame for any bending using a flat granite surface plate; a deviation of more than 0.15 mm at the motor seat will generate unbalanced vibration. All GPS and vision sensor modules must be tested for connectivity because coaxial cable crimps can fracture internally without visible damage. The DJI log will often show "Navigation System Error" (Code 0x800004) if a vision sensor ribbon has torn. In Shenzhen, China, our structural evaluation includes a thrust‑balance test on all four motors at full RPM to detect invisible frame twists that cause yaw oscillation.

Frame and Chassis Repair Strategies

Damaged arms on the Mavic Air can be replaced individually. A single motor arm replacement costs $60–80 at Reboot Hub including labour with soldering of the motor harness. If the mid‑frame has cracked motor seat bosses, chip‑level frame repair is not recommended due to flight safety – the complete lower and mid‑frame set should be replaced, costing approximately $230–320 including labour. When only the top cover shell or landing gear is damaged, injection‑molded replacement parts run $15–30. A full structural rebuild with comprehensive post‑repair vibration analysis falls within the range of $130–580 depending on severity.

Cost‑Effective Repair vs. Total Replacement Analysis

A Mavic Air with a cracked arm and a functional core board can be restored for about $130–195, making repair far more sensible than a new drone purchase. However, when the forward vision system, core board, and mid‑frame are all compromised, repair costs approach $515–580. At that threshold, comparing against a replacement drone becomes prudent. Our chip‑level expertise allows us to salvage functional subassemblies – such as the camera, ESCs, and GPS module – and integrate them into a new frame, offering a rebuilt aircraft with factory‑grade performance at roughly 60% of the price of a new unit. A detailed cost breakdown is available in our Drone Repair Cost Comparison and the Reboot Hub DJI Repair Cost Database 2026.

What Does Professional DJI Mavic Air Chip-Level Repair Involve?

Precision chip‑level repair of the DJI Mavic Air demands a structured diagnostic workflow that isolates faults down to the individual component. At Reboot Hub, technicians certified to MOHRSS Level 3 standard follow a systematic protocol that combines proprietary test jigs with industry‑standard measurement equipment.

Professional Diagnostic Equipment Overview

The diagnostic bench for a Mavic Air includes an RF‑shielded enclosure, a 4‑channel 300 MHz oscilloscope for signal integrity verification, a 0.1 mV‑resolution milliohm meter for power rail short detection, and a FLIR thermal camera for scanning hot spots on powered boards. Specific jigs allow us to power the core board outside the drone while injecting controlled PWM signals into the ESC section and reading motor phase outputs. A dedicated battery emulator provides the BMS with SMBus commands to extract hidden fault logs, which frequently reveal intermittent failures that a simple LED blink code cannot. This toolset, used by MOHRSS Level 3 practitioners, ensures that no fault remains undiagnosed.

Chip‑Level Repair Methodology

Once the faulty component is identified – be it a corroded capacitor, a BGA chip with micro‑cracks, or a lifted connector pad – the repair follows precise micro‑soldering steps. We use BGA rework stations with profile‑controlled heating to remove and replace components without warping the 8‑layer PCB. All repairs on the flight controller's power management ICs (e.g., TPS65023) are verified under load using current injectors. Our chip‑level expertise allows precise, cost‑effective repairs that restore your Mavic Air to factory performance standards. After soldering, boards undergo a multi‑step cleaning process to remove flux residues that could cause parasitic leakage under humidity. The entire workflow is documented for traceability, a practice aligned with MOHRSS Level 3 quality assurance requirements. Learn more about Reboot Hub's professional DJI repair service.

Quality Assurance and Testing Protocols

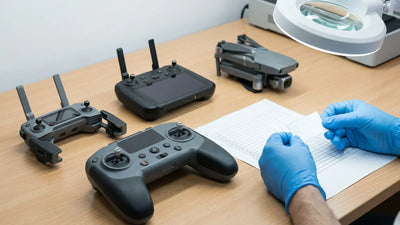
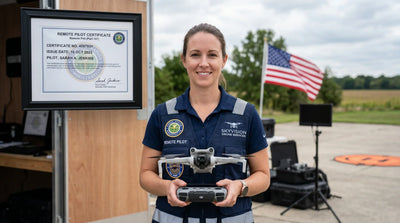
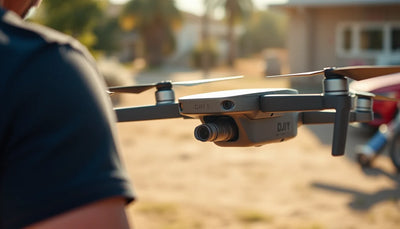
DJI Mavic Air Comprehensive Repair Guide Expert Di - professional repair process

Repaired drones must pass a 12‑point flight readiness checklist: IMU calibration stability over a 60‑minute cold start, ESC thermal balance under full‑throttle static run, gimbal horizon hold during aggressive yaw, GPS acquisition time, image transmission bit rate, and an outdoor hover test with a 15‑minute full discharge. Vibration spectra are recorded using onboard accelerometers and compared to a reference healthy Mavic Air. Only when the machine shows less than 0.05 g RMS vibration across the spectrum do we sign off the repair. Customers receive a detailed report of performed work and replaced components. Post‑repair success rates exceed 97% for common faults when following this rigorous methodology.

Schedule a Professional Diagnostic at Reboot Hub in Shenzhen, China

Frequently Asked Questions

Why does my Mavic Air refuse to power on even with a charged battery?

First, clean the battery contacts with isopropyl alcohol and test with a known-good battery. If there is no LED activity on the drone, a blown power management IC on the main board is likely. Main board chip-level repair at Reboot Hub costs $150–180 with a turnaround of 2–4 business days. Reboot Hub's schematic database can help you trace the core voltage rail before attempting a board-level repair. We recommend sending the unit for professional diagnosis rather than risking further damage to the multilayer PCB.

How can I permanently fix a recurring gimbal overload error after a minor crash?

Remove the gimbal vibration dampener and inspect the flex ribbon cable for micro-tears near the roll axis fold—this is the most common failure point. A ribbon cable replacement at Reboot Hub costs $50–80 and typically takes 2–3 business days. After replacing the ribbon, recalibrate the gimbal via DJI Assistant 2 and confirm the yaw motor shaft is perfectly straight. We recommend prompt repair to prevent further stress on the gimbal motor driver IC.

One motor stutters and I see an ESC error in the app. Is this repairable without replacing the whole aircraft?

Yes, the error typically points to a burned MOSFET on the ESC board. Skilled users can replace the individual MOSFET using a hot-air station and the correct thermal profile, but for most owners the safer solution is professional chip-level repair. ESC repair at Reboot Hub costs $70–90 and is completed in 2–4 business days. Reboot Hub has a step-by-step solder guide with specific pad-cleaning techniques.

My Mavic Air battery flashes a single LED and won't charge. Can I revive it?

This single-blink pattern signals a deep discharge state where the battery's BMS has locked out charging for safety. Battery management board repair at Reboot Hub costs $60–80 with a 2–3 business day turnaround. While a hobby charger in NiMH mode can sometimes force voltage back above the lockout threshold, a permanently unbalanced cell requires professional recycling; never attempt to puncture a swollen pack. We recommend professional BMS reset to restore safe charging behaviour.

What is the proper procedure to replace a cracked front arm on the Mavic Air?

The repair involves desoldering the three motor wires from the main board, carefully threading them through the new arm, and resoldering with leaded solder for better flow. A motor arm replacement at Reboot Hub costs $60–80 including labour and is completed in 2–4 business days. You must also apply conformal coating to the solder joints afterward to prevent corrosion, as detailed in the full teardown on Reboot Hub. We recommend replacing the arm promptly to avoid intermittent motor connection failures during flight.

How much does a typical DJI Mavic Air repair cost at Reboot Hub?

Most common DJI Mavic Air repairs cost between $50–280 at Reboot Hub's chip-level repair centre in Shenzhen, China. Ribbon cable replacements start at $50–80, ESC repairs run $70–90, IMU sensor replacement is $50, battery management board repair is $60–80, and full gimbal module refurbishment is $200–280. Turnaround is 2–4 business days for most repairs. We recommend booking a free diagnostic assessment to receive an exact quote before committing to any repair.

How long does DJI Mavic Air repair take, and do you accept international shipments?

Standard DJI Mavic Air chip-level repairs are completed in 2–4 business days at Reboot Hub in Shenzhen, China, with complex multi-system repairs taking up to 5 business days. We accept international shipments from customers worldwide — simply contact us through our website to arrange shipping instructions and receive a prepaid label where available. We recommend using tracked express shipping to minimise transit time and ensure your drone arrives safely for diagnosis.

Reboot Hub · Expert Repair

Ready for a Professional Diagnosis?

Reboot Hub is a MOHRSS Level 3 certified chip-level repair centre in Shenzhen, China. We repair what other shops replace — at a fraction of the cost.

Prev post
Next post

Leave a comment

Please note, comments need to be approved before they are published.

Thanks for subscribing!

This email has been registered!

Shop the look

Choose options

Edit option
Back In Stock Notification
this is just a warning
Login
Shopping cart
0 items
0%