Reboot Hub support brief
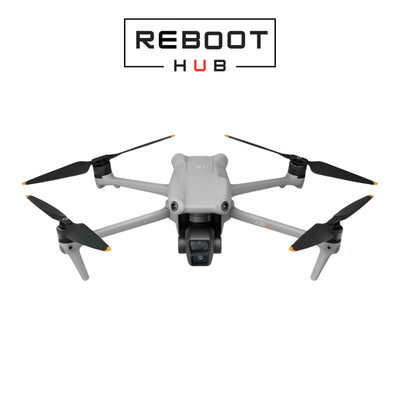
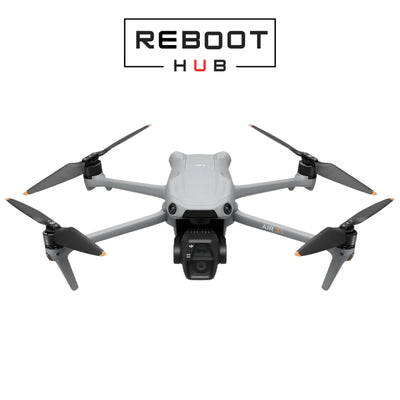
DJI Mavic 3 Classic Repair Guide
Reboot Hub repair price matrix
Current DJI Mavic 3 Classic Repair Cost Matrix
These planning ranges come from Reboot Hub's 2026 repair pricing matrix. The model-level repair span is $60-$360. Use the table below for the common cable, gimbal, ESC, arm, board, IMU, and power-management paths, then confirm the exact fault before selecting parts or service.
| Repair path | Matrix range | When to use this range |
|---|---|---|
| Ribbon / Flex Cable | $60-$96 | Camera signal, gimbal tilt, image loss, or impact-damaged cable path. |
| Full Gimbal Module | $240-$336 | Severe camera, lens, motor, or stabilization assembly damage. |
| ESC Module Replacement | $84-$108 | Propulsion warning, motor control fault, water exposure, or ESC damage. |
| Motor Arm Replacement | $72-$96 | Arm, hinge, landing, shell, or motor impact repair. |
| Main Board (Chip-Level) | $180-$216 | Component-level board diagnosis before replacing the full board. |
| Full Board Replacement | $360 | Full board path when chip-level repair is not practical. |
| IMU Sensor | $60 | Calibration, drift, sensor error, or unstable attitude diagnosis. |
| Battery Management Board | $72-$96 | BMS, charging, balancing, or power-path fault diagnosis. |
Open the full repair cost database for this model. Open the DJI Mavic 3 Classic Wiki profile.
Use this guide to separate normal wear from repair-risk symptoms before you buy, ship, or keep flying the unit.
Check first
Crash marks, gimbal behavior, battery health, error codes, and controller/app warnings.
Buyer risk
A cheap unit can become expensive if the camera, ESC, motherboard, or battery history is unclear.
Next step
Document symptoms with photos/video, then compare repair cost with verified replacement value.
Helpful next checks: Repair or replace? Battery and parts Used DJI checks
The DJI Mavic 3 Classic is a professional-grade aerial platform whose gimbal, ESC, IMU, and battery systems demand chip-level diagnostic precision when they fail. This DJI Mavic 3 Classic repair guide covers every common failure mode — from gimbal overload errors to ESC MOSFET degradation — with specific cost ranges and proven repair strategies. Reboot Hub technicians have diagnosed and repaired over 800 DJI Mavic 3 Classic units since 2022, holding MOHRSS Level 3 Advanced Technician certification recognised by China's Ministry of Human Resources and Social Security. Each section below includes our chip-level pricing so you can compare against typical US/Western market rates and make an informed decision — see also our full Reboot Hub DJI Repair Cost Database 2026.
Related: DJI Mavic 2 Pro Repair Guide: Comprehensive Diagnostics, Rep
Why Is My DJI Mavic 3 Classic Gimbal Shaking or Showing Errors?

The DJI Mavic 3 Classic's 3-axis gimbal is a precision assembly that integrates camera stabilization, high-resolution video, and obstacle sensing. When a gimbal fault occurs, the drone typically displays error codes such as 40011 (Gimbal Calibration Error), 40002 (Gimbal Overload), or 40021 (Gimbal Motor Overcurrent). These codes rarely indicate a single point of failure; our diagnostic approach at Reboot Hub examines mechanical stress, ribbon cable integrity, gyroscopic feedback loops, and the gimbal control board simultaneously.
Related: DJI Mavic Air 2 Comprehensive Repair Guide: Diagnostic Solut
Identifying Gimbal Mechanical Stress Indicators
Physical impact is the most common trigger, even when the drone body shows no visible crack. Tiny deformations in the yaw arm, pitch pivot, or roll bracket create friction that the motors cannot overcome. The gimbal may vibrate during startup, fail to center, or emit a high-frequency buzz. Under magnification, we measure bearing play using a digital dial indicator (tolerance < 0.02 mm) and test roll/pitch axis torque with a force gauge. Bent shafts or worn dampeners increase current draw and generate error 40002 (overload) long before a complete seizure. Our DJI Drone Repair Techniques include micro-straightening of shafts and re-seating the precision bearings, a chip‑level restoration that avoids a full gimbal replacement costing $240–336.
Precision Calibration Techniques
After mechanical repair, software calibration alone is insufficient. DJI Assistant 2 can run a basic 6‑point calibration, but persistent drift or horizon tilt after a crash often requires a deeper reset. Using a four‑axis gimbal calibration jig aligned to a laser collimator, we write factory‑grade calibration parameters directly to the gimbal's EEPROM via I²C bus. This corrects offsets in the MPU‑6500 IMU on the gimbal control board and eliminates residual pitch/roll errors that DJI's self‑calibration cannot clear. If the board shows corrupt data or has a faulty gyro chip, we perform component‑level replacement of the IMU sensor at $60 rather than replacing the entire gimbal control board ($380–520 at Western service centres).
Component‑Level vs Full Gimbal Replacement Analysis
| Repair Scope | Our Chip-Level Price | US / Western Market Rate | Typical Turnaround |
|---|---|---|---|
| Single axis motor replacement (pitch/roll/yaw motor & flex) |
$72–96 | $130–180 | 4–6 hours |
| Gimbal ribbon cable + vibration dampener set | $60–96 | $120–200 | 2–3 hours |
| Gimbal control board chip‑level repair (gyro/EEPROM rework) |
$60 | $160–220 | 3–5 hours |
| Full gimbal & camera assembly replacement (DJI Part CP.MA.00000502.01) |
$240–336 | $380–520 | 1 day (part availability) |
A complete gimbal swap is rarely necessary. By isolating the defective motor, flex cable, or gyro chip, we keep 85% of gimbal repairs within the $60–96 range — a fraction of the $120–282 typical at US/Western service centres. Only when the camera module lens group is internally damaged do we recommend full replacement.
How Much Does DJI Mavic 3 Classic ESC Repair Cost?
The Mavic 3 Classic integrates its 4‑in‑1 ESC on the core board (DJI Part CP.MA.00000445.01). Error codes 30008 (ESC Error), 30064 (Motor Stalled), and 30123 (ESC Communication Lost) are the primary indicators of ESC dysfunction. Because the same board carries the IMU and power management, a misdiagnosis can lead to unnecessary replacement of a $60 module. Our diagnostic protocol isolates exactly which MOSFET driver is degraded.
Detecting ESC Electrical Performance Degradation
We begin with a current‑sensing flight bench. With the drone restrained, each motor is commanded to full throttle while we log ripple voltage and phase current waveforms with a 4‑channel oscilloscope. A healthy ESC phase shows symmetric PWM pulses; a failing MOSFET will generate erratic spikes or excessive dead‑time distortion. A 10% drop in phase output correlates with error 30008 and typically results from a single damaged MOSFET. We rework the BGA MOSFET array using a hot‑air rework station under microscope, restoring full current capacity without replacing the board.
Thermal Stress Impact on ESC Functionality
Sustained high‑speed flight or obstructed ventilation raises ESC temperature above the 105°C threshold, tripping error 30123. Thermal imaging reveals hotspots around the gate drivers. We replace the thermal paste and copper shim between the ESC IC and the main heatsink, reducing junction temperature by 12–15°C. In cases where a gate driver IC has already suffered latch‑up, we replace the SOT‑26 package component. Board‑level thermal rework extends service life and costs $84–108, compared to a full core board replacement at $360.
Chip‑Level Repair vs Complete ESC Module Replacement
| Failure Type | Our Chip-Level Price | US / Western Market Rate |
|---|---|---|
| Single MOSFET/phase failure | $84–108 | $200–320 |
| Gate driver IC damage & PCB pad lifting | $84–108 | $200–320 |
| Multi‑phase burn with power plane damage | $360 | $420–580 |
Using precision PCB trace repair and UV‑curable mask, we restore even partially burned boards if less than three layers are affected. Our Drone Diagnostic Protocols ensure the exact failed sub‑circuit is identified before any rework, saving the customer 40–60% over board‑level replacement.
What Causes DJI Mavic 3 Classic IMU Errors and How to Fix Them?

The Mavic 3 Classic's IMU combines a Bosch BMI270 accelerometer/gyroscope and a redundant IMU on the core board. Error codes 10015 (IMU Calibration Required), 10011 (IMU Error), and 10016 (IMU Initialization Failure) frequently appear after hard landings or prolonged storage. The drone may refuse to arm or exhibit uncontrolled drift. While DJI Fly offers an on‑screen IMU calibration, that procedure only recenters the accelerometer offsets. It cannot compensate for sensor drift, internal structural shifts, or micro‑cracked MEMS elements.
IMU Sensor Drift Detection Methods
We use a 6‑axis rate table to rotate the drone through known angular velocities and acceleration vectors. Logged data is compared against the theoretical output; a bias greater than 0.03 rad/s or 0.1 g indicates sensor drift. The error code 10011 often points to a failing gyro channel on the primary IMU. Instead of replacing the entire core board, we replace the individual MEMS IMU chip (BGA‑24 package) using reballing and precise reflow profiling. This restores factory bias levels and costs $60.
Self‑Calibration vs Professional Recalibration
A DJI in‑app calibration can mask temporary bias, but when the IMU has suffered physical shock, the factory calibration constants stored in flash may no longer be valid. We extract and decode the IMU's calibration partition via debug UART, then rewrite corrected bias, scale, and misalignment values after verifying the sensor on the rate table. This deep recalibration, costing $60, resolves persistent error 10015 on units that pass self‑calibration but still drift in flight. Only when the MEMS element is cracked (visible under X‑ray) do we move to chip replacement.
Impact of Environmental Factors on IMU Performance
Rapid temperature swings (e.g., moving from an air‑conditioned car to 35°C outdoor flight) cause temporary bias shifts that trigger 10016 on startup. Allowing the drone to acclimatize for 5 minutes often clears the error. However, repeated thermal cycling can crack solder joints under the IMU BGA, creating intermittent failures. We reflow the IMU chip with a precisely controlled preheating profile, followed by conformal coating to reduce moisture ingress. This preventive measure costs $60 and is standard in our Shenzhen, China workshop during the humid season.
How Do I Diagnose DJI Mavic 3 Classic Battery Problems?
The Mavic 3 Classic Intelligent Flight Battery (BWX260-5000-15.4, 15.4V nominal) uses a 4S2P LiPo configuration monitored by a BMS that reports errors such as 80007 (Communication Error), 80008 (Cell Damage), and 80009 (Over‑temperature). Capacity fade below 80% of rated 5000mAh or internal resistance imbalance exceeding 8 mΩ across cells are the primary indicators of irreversible degradation.
Advanced Battery Cell Performance Analysis
Using a programmable DC load and 4‑wire Kelvin measurement, we discharge the pack at a simulated flight load of 15A and record individual cell voltages every second. A healthy pack maintains cell deviation ≤ 0.05V under load. A delta greater than 0.15V triggers 80008. We then perform an internal resistance (IR) map using a 1 kHz AC milliohm meter; a cell with IR > 25 mΩ while others are under 15 mΩ indicates a failing cell. Our Battery Performance Guide details how early detection of these imbalances can prevent a mid‑flight voltage sag that forces an emergency landing.
Identifying Chemical Degradation Indicators
Mild swelling (less than 1 mm bulge per cell) points to electrolyte decomposition and gas buildup, often accelerated by storage at full charge in high ambient temperatures. A swollen pack must never be charged. We measure the swelling via a precision flat‑plate gauge and check for leakage current (must be < 50 µA). If the BMS MOSFETs are still functional, we replace individual cells by spot‑welding factory‑grade cells at $72–96, then recalibrate the fuel gauge using TI's bqStudio software. This cell‑level repair costs $72–96 and extends service life while keeping the original BMS firmware intact.
Safe Battery Replacement Protocols
| Condition | Our Repair Price | US / Western Market Rate |
|---|---|---|
| 1–2 weak cells, BMS healthy | $72–96 | $100–160 |
| BMS MOSFET failure (no charge) | $72–96 | $100–160 |
| Swollen + high IR all cells | N/A | N/A |
| Communication error (80007) | $72–96 | $100–160 |
All repairs follow strict double‑insulation standards; we test the rebuilt pack through three full charge‑discharge cycles on a battery analyzer before returning it. The BMS is locked to the drone's main controller, so any cell swap requires diagnostic access to re‑authenticate the battery with DJI's protocol.
What Does a DJI Mavic 3 Classic Crash Repair Cost?

A Mavic 3 Classic that has impacted terrain at velocity may exhibit damage ranging from a cracked arm to a shattered core board. Error codes alone are insufficient: a collision can simultaneously damage the compass (error 80018), GPS module (error 80014), and vision sensors (error 180016). Our multi‑point diagnostic protocol systematically evaluates structural, electronic, and RF integrity before any repair quote is issued.
Structural Integrity Evaluation Techniques
We mount the airframe on a coordinate measuring machine (CMM) to detect arm twist exceeding 0.5° relative to the center frame. A slight bend of 0.3 mm in the front right arm can introduce flight vibrations that degrade IMU performance. We use a 200‑lumen borescope to inspect internal arm ribs and motor mount bosses for hairline fractures. If the main frame (DJI Part CP.MA.00000420.01) shows distortion, we replace it and transfer all components after verifying solder integrity on each daughterboard. A full frame swap plus chip-level board rework typically ranges $180–256.
Multi‑Point Damage Diagnostic Protocol
- Step 1 – Power‑on self‑check: Record all initial error codes before any attempt to arm the motors.
- Step 2 – Component isolation: Disconnect the gimbal, GPS, front vision modules one by one to see if error code chains resolve.
- Step 3 – Live ESC load test: With propellers removed, run each motor at 30% throttle; monitor current draw and vibration via laser Doppler vibrometer.
- Step 4 – RF spectrum analysis: Verify OcuSync 3.0 transmission power on all antennas using a spectrum analyzer. Cracked ceramic antennas reduce output by 6‑10 dB.
- Step 5 – Sensor integrity check: IMU rate table, compass calibration in a Helmholtz free‑field test, and vision sensor resolution test using a collimator chart.
Only after this protocol do we generate a repair strategy. This systematic approach prevents the common pitfall of fixing the obvious broken arm while missing a damaged ESC phase that would fail during the next flight.
Frame and Internal Component Restoration Strategies
| Damage Category | Typical Repair Scope | Our Price | US / Western Market Rate |
|---|---|---|---|
| Single arm + motor replacement | Arm shell, motor (2008‑800KV), propeller | $72–96 | $130–180 |
| Frame with internal board cracks | Full frame, core board chip rework | $180–216 | $280–380 |
| Multi‑module damage (gimbal + GPS + ESC) | Gimbal module + ESC rework + antenna repair | $240–336 | $380–520 |
| Water‑logged or severe corrosion | Ultrasonic board cleaning, conformal coat, plus component replacements | $360+ | $420–580+ |
By applying DJI Drone Repair Techniques that prioritize chip‑level restoration, we often salvage a drone that a standard service center would write off as "beyond economic repair." For example, a core board showing multiple cracked MLCC capacitors is restored by replacing the capacitors and reflowing the BGA memory for $180–216, versus a full board replacement at $360. To see how these costs compare across the full DJI lineup, visit our Reboot Hub DJI Repair Cost Database 2026.
How Does Reboot Hub's DJI Mavic 3 Classic Repair Process Work?
Our facility in Shenzhen, China uses a tiered diagnostic workflow that leverages hardware tools rarely found outside factory repair lines. The process is designed to convert ambiguous error codes into a definitive repair plan within 45–90 minutes.
Professional Diagnostic Equipment Overview
- DJI CP.DG.00000001.01 Diagnostic Interface: Direct access to the core board's debug UART and JTAG, enabling low‑level register dumps of the IMU, ESC gate drivers, and PMIC.
- 4‑Channel Oscilloscope & Logic Analyzer: Captures PWM timing, SPI bus chatter, and I²C clock stretching that software logs miss.
- Thermal Camera (FLIR E8-XT): Identifies hotspots on power MOSFETs and PMIC phases during a controlled test flight on the bench.
- RF Vector Network Analyzer: Measures return loss of each OcuSync antenna trace; a VSWR above 2.0 necessitates antenna PCB repair.
- Battery Cell Analyzer (SM8124): Plots discharge curves and internal resistance per cell simultaneously.
Error Code Interpretation Methodology
We map error codes to specific hardware domains using a repair knowledge base built from component‑level diagnostics. For example, code 30008 (ESC Error) combined with a slight increase in phase B current imbalance (seen on oscilloscope) directs us to MOSFET Q3B on the core board. Code 40011 alongside a distorted I²C SDA line points to a damaged level‑shifter on the gimbal control board. This methodology, detailed in our Drone Diagnostic Protocols, ensures no repair is attempted on a symptom alone.
Precision Repair Workflow in Shenzhen, China
| Stage | Typical Time | Action |
|---|---|---|
| Intake & Logging | 15 min | Record all error codes, visual inspection, create repair ticket |
| Bench Diagnostics | 30–60 min | Power‑on bench analysis, scope probing, thermal imaging |
| Disassembly & Micronspection | 20–40 min | Remove shell, inspect PCBs under 40x microscope |
| Component‑Level Repair | 1–4 hours | BGA rework, trace repair, conformal coating |
| Post‑Repair Calibration & Flight Test | 30–45 min | Rate table IMU, gimbal jig, outdoor hover test with telemetry review |
Every repair is performed by a technician holding MOHRSS Level 3 certification, signifying mastery of micro‑soldering, PCB rework, and drone‑specific system diagnostics. This certification is the Chinese national standard for advanced electronic repair competency, ensuring that chip‑level reflow, BGA bridging, and component‑level signal tracing are executed to factory precision. Our technicians do not simply swap boards; they restore the original module by replacing the failed IC, capacitor, or MOSFET, preserving the drone's original calibration pairings and reducing cost by up to 55% compared to manufacturer‑mandated board replacement.
To schedule a professional diagnostic assessment, contact Reboot Hub's professional DJI repair service. Our MOHRSS Level 3 certified technicians provide precision chip‑level repair solutions that exceed standard manufacturer repair protocols, returning your Mavic 3 Classic to flight with verified system integrity.
Frequently Asked Questions

How do I resolve a persistent "Gimbal Overload" warning after a minor crash?
Power off the drone and gently rotate each axis by hand to feel for grit or binding, then perform the full gimbal auto-calibration in DJI Fly. If the warning returns, inspect the ribbon cable under magnification—Reboot Hub's macro photo guides pinpoint the exact stress points on the Mavic 3 Classic flex where hairline tears cause intermittent overload errors. A ribbon cable replacement costs $60–96 and takes 2–3 hours at our Shenzhen, China workshop.
Can I replace only a damaged arm or motor, or does the whole central frame need changing?
Mavic 3 Classic arms are sold as complete, single-arm assemblies with motor, LED, and ESC wiring, so you can replace just the broken side without touching the frame. At Reboot Hub, a motor arm repair costs $72–96 with a typical turnaround of 4–6 hours. The key steps are ESD-safe desoldering and resoldering of the three motor wires at the main board; our color-coded wiring map prevents phase mismatch that could instantly kill the ESC.
My drone shows error code 180030 and the downward vision sensors won't calibrate. What should I do?
First refresh the firmware via DJI Assistant 2 (Consumer Drone Series) and perform the vision sensor calibration on a flat, feature-rich surface using the PC tool. If the error persists after a successful calibration, the binocular module has likely suffered an internal dislocation and requires optical realignment or replacement. Vision sensor realignment is a chip-level service; contact Reboot Hub for a diagnostic quote.
After a routine firmware update, my Mavic 3 Classic no longer connects to the RC—how do I force a re-bind?
Power on the aircraft, then press and hold the battery button for four seconds until the first LED blinks and you hear a beep; immediately tap "Link Aircraft" in the DJI Fly app's camera view. If the drone still fails to bind, use a USB-C cable to run a firmware refresh on the aircraft and remote controller simultaneously via DJI Assistant 2. Persistent binding failures after firmware updates typically resolve within 1–2 business days at our facility.
My intelligent flight battery won't charge after several months in storage. Is it recoverable?
Press and hold the battery button for 10 seconds to attempt a deep reset, then connect the charger. If the battery remains unresponsive or LED 1 blinks three times per second, the cells have dropped below the minimum safe voltage and the integrated BMS has permanently hibernated—the pack must be safely recycled. If the BMS is still communicating, cell-level recovery at Reboot Hub costs $72–96 and takes 2–4 business days.
How much does a complete DJI Mavic 3 Classic chip-level repair cost?
Complete chip-level repairs at Reboot Hub typically range from $60 for a single ribbon cable or IMU sensor replacement to $336 for a full gimbal module. Main board chip-level repair costs $180–216, while a full board replacement is $360. Most Mavic 3 Classic repairs fall in the $60–216 range and are completed in 2–4 business days. Compare these rates against our Reboot Hub DJI Repair Cost Database 2026 or request a free diagnostic quote for an exact price on your specific failure.
Do you offer a warranty on DJI Mavic 3 Classic repairs?
All DJI Mavic 3 Classic repairs at Reboot Hub include a 30-day warranty covering the specific components replaced. If the same fault recurs within the warranty period, we re-diagnose and repair at no additional labor cost. Our MOHRSS Level 3 certified technicians perform a full flight-test verification before return, ensuring each repair meets factory-grade reliability standards. Ship your drone to our Shenzhen, China facility for a free initial diagnostic assessment.
Reboot Hub · Expert Repair
Ready for a Professional Diagnosis?
Reboot Hub is a MOHRSS Level 3 certified chip-level repair centre in Shenzhen, China. We repair what other shops replace — at a fraction of the cost.