Support & Learning / Module 4 branch
Command, Radio and Video Link
Before this lesson: How DJI Drones Transmit Commands, Telemetry and Live Video
What you will understand
- Understand command, telemetry, video and interference evidence.
- Separate observable evidence from assumptions before choosing an action.
- Continue through the main lesson path or enter a focused topic branch when needed.
DJI controller symptom and service decision
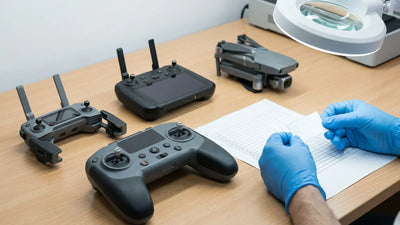
A controller symptom does not automatically prove a damaged port, stick module, radio section or main board. Start with symptom isolation across the exact controller, aircraft, app, cable, mobile device, power state, pairing relationship and event history. Supported external checks come first. Component-level repair is a professional service boundary, not a public soldering tutorial.
Quick answer
Separate setup and connection faults before choosing repair
Identify the exact controller and compatible aircraft; record whether the concern involves power, charging, mobile-device connection, sticks, buttons, screen, pairing or signal; repeat only supported cable and mobile-device checks; use current DJI calibration with the aircraft powered off when appropriate; and preserve evidence. If the symptom remains, keep the controller closed and decide between professional repair or replacement.
What should be visible before the customer acts?
A trustworthy support page connects the customer's concern to exact-unit evidence, a written decision boundary and a useful next action. This table is the decision spine for the topic.
Which DJI remote controller and system are you diagnosing?
Record the exact controller model and the aircraft it is expected to operate. DJI RC, DJI RC 2, DJI RC Pro, RC-N1, RC-N2, FPV controllers and Enterprise controllers do not share one app, screen, cable, pairing or calibration path. Confirm the supported relationship in current DJI documentation before treating a connection failure as hardware damage. Include the mobile device and cable when the controller depends on them.
Capture the event history: drop, impact, moisture, unusual heat, port stress, update, storage period or gradual change. Note whether the controller powers on, accepts charge, connects to a phone, links to the aircraft, responds to sticks and buttons, and shows a stable display. Keep observations separate. A controller can have a working screen and a link concern, or a cable concern and normal radio behavior.
Which cable and mobile-device checks can isolate an external fault?
For controllers that use a phone, inspect the external cable and port without inserting tools or applying side load. Compare a supported known-good cable and, where DJI guidance calls for it, another compatible mobile device or operating system. Remove a phone case if it prevents full connector seating. Back up important app data before any supported reinstall or reset decision, and keep the original symptom record.
These cable and mobile-device checks can show whether the failure follows an external dependency, but they do not prove the internal port is healthy. If different supported cables and devices produce the same symptom, preserve that result for service intake. Do not open the controller to inspect a port or trace. A visible connector can still require professional diagnosis when the fault is intermittent or load-dependent.

How should sticks, dials and buttons be checked?
Use the current calibration route for the exact controller and app. DJI's current guidance instructs users to keep the aircraft powered off during remote-controller calibration and to follow the on-screen movement prompts for sticks and applicable dials. Record whether controls reach their expected range, return consistently and trigger the intended supported function. Do not invent numeric pass thresholds that are not shown by the current interface.
A calibration that completes can be useful evidence, but it does not erase impact, contamination or an intermittent hardware symptom. A calibration that fails or a button that remains unresponsive should move to support or service intake after external obstruction and setup questions are ruled out. Avoid repeated resets that destroy the sequence of evidence. Keep the controller model, app and firmware context with every screenshot or video.
How should pairing, link and signal symptoms be separated?
First distinguish mobile-device connection from controller-to-aircraft linking and from in-flight transmission behavior. Confirm model compatibility, supported pairing state, antenna position and current warnings. A short-range or disconnect complaint can be shaped by the site, obstruction, interference, aircraft state, controller damage or an unsupported system combination. One distance number cannot diagnose the radio section.
Do not perform uncontrolled range experiments to prove a repair need. Reproduce the concern only in a lawful low-risk setting appropriate to the product, and stop when the evidence is sufficient. Record the environment, aircraft, controller, warning and whether the issue repeats at a known safe baseline. If a link concern persists after supported checks, send the controller and any requested related equipment through the written service path.
Where does chip-level controller repair belong?
Component-level repair is a professional service boundary. A trained technician may use inspection and controlled diagnostic equipment to decide whether a connector, control assembly, display path, power section, radio path or board requires work, but the public customer page should not publish temperatures, pads, component substitutions or step-by-step soldering instructions. Those details depend on the exact hardware revision and service evidence.
Keep the housing closed after the supported external checks. Opening the controller can add damage, erase evidence and change warranty or service options. The useful customer contribution is accurate symptom isolation, photographs of the intact unit, app or warning evidence, compatible-system details and event history. Reboot Hub can then define the proposed scope and approval boundary before component work begins.

When is repair stronger than replacement?
Repair can be reasonable when the exact controller is compatible with the customer's aircraft, its identity and broader condition are clear, the fault can be scoped and the customer values continuity with that system. Replacement can be stronger when compatibility is uncertain, damage is broad, evidence is incomplete, downtime dominates the decision or a documented available controller provides a cleaner path. Compare the complete operational result, not a single headline price.
For a replacement, verify exact compatibility, condition, supplied cable or accessories, account or pairing context and written warranty terms. For repair, verify intake evidence, approval, affected scope, return checks and the 30-Day Repair Warranty boundary. A used controller should not be sold as fully verified merely because it powers on. The buyer should see what was checked and what remains unknown.
How does Reboot Hub make the controller decision transparent?
Reboot Hub works from the customer's point of view and tries to remove all reasonable concerns that can be answered before commitment. We identify the exact controller and aircraft, collect the symptom and event evidence, separate supported external checks from professional diagnosis and state the proposed scope in writing. Unknowns remain visible instead of being hidden behind a chip-level or tested label.
Use the professional repair pillar for intake and approval, the repair-cost database for current public pricing, the warranty policy for written scope, The Reboot Hub Standard for evidence handling and the Drone Wiki for model context. If replacement is the stronger path, actual pre-owned inventory should show the supplied unit and condition. This gives beginners a clear route and professional operators a traceable repair or replacement record.
Keep exploring
Further reading
From The Reboot Hub Chronicle







From Drone Guides