Support & Learning / Module 6 branch
Propulsion, Battery and Power
Before this lesson: Keep the aircraft unpowered whenever blade, hub, motor or structure integrity is uncertain.
What you will understand
- Inspect every blade edge, root, hub, marking and attachment point.
- Identify stop-flight evidence without sanding, gluing or straightening damage.
- Verify exact compatible replacement and staged acceptance evidence.
Propulsion safety before every flight
A DJI propeller is a rotating flight-critical component, not a cosmetic consumable. A small edge chip, stressed blade root, distorted hub, incorrect marking or damaged fastener can change load, vibration and control even when the aircraft can still start. This guide begins with the customer's concern and builds written evidence from the exact model, propeller position, event and observed condition. It explains what can be inspected safely, when the aircraft becomes a stop-flight case and how Reboot Hub turns case-level experience into a transparent replacement and acceptance path without sanding, gluing or straightening a damaged blade.
Quick answer
If blade integrity or attachment is uncertain, keep the aircraft grounded
Inspect every blade edge, blade root, hub, marking, hinge where fitted and fastener before flight and after impact, transport damage or an abnormal sound. Stop-flight when there is a crack, chip, split, deformation, loose or stiff hinge, damaged hub, uncertain attachment, contact mark or model mismatch. Do not sand, do not glue and do not straighten a propeller. Use the exact model- and position-compatible replacement and verify written evidence before a staged flight.
Which decision branch fits the customer's concern?
What evidence should be retained before action?
How should a DJI propeller inspection begin?
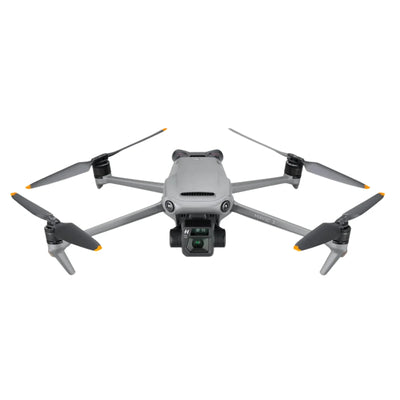
Power the aircraft down, remove or isolate the battery as the exact model permits, and place the aircraft on a clean stable surface. Record the model, propeller markings, position and the reason for inspection. Use good diffuse light. Inspect both faces of every blade, not only the tips. Compare corresponding propellers while remembering that clockwise and counter-clockwise positions may use different markings or geometry. Hold folding blades by the hub rather than loading the thin airfoil.
The initial record matters after an impact or transport event. Photograph the affected corner before removing hardware, and note contact marks, debris, guard damage, arm angle and the first warning or sound. A blade that looks acceptable in one photograph may have root stress, a stiff hinge or a damaged hub. Reboot Hub writes the known and unknown findings against the exact model and position so the customer understands whether the concern is confined to a replaceable propeller or extends into the motor and structure.

Which blade-edge and surface signs require stop-flight?
Treat any crack, split, missing material, deep nick, delamination, heat deformation or profile change as stop-flight. Inspect the leading edge, trailing edge, tip, upper and lower faces and the transition into the blade root. Stress whitening can indicate material loading even when the surface has not opened. A light removable deposit is different from a gouge; clean gently enough to reveal the surface, but do not polish away evidence or change the blade profile.
Do not sand the propeller, do not glue it and do not straighten it. Those actions can hide damage, change mass or profile and create false confidence without restoring verified strength. A repair-bench observation about one damaged blade is publishable as case-level evidence when it remains tied to the exact aircraft, propeller marking, event and observed condition. It must not become an absolute statement that every vibration on every DJI model has the same cause.
Why do the blade root, hub and folding joint matter?
Centrifugal and aerodynamic loads travel through the blade root into the hub and attachment. Inspect the root for cracks, discoloration, deformation and looseness. On folding propellers, compare hinge freedom and stop position across the correct paired blades. A joint that binds, drops without control, has excessive play or no longer reaches the same position is not cleared by an intact-looking tip. Inspect the hub around every fastener and molded feature.
Do not lubricate a folding joint unless the exact manufacturer procedure explicitly requires it; contamination can attract debris or reach unsuitable surfaces. Do not swap isolated blades between unrelated sets simply because the screw fits. The compatible replacement may be specified as a matched pair or set with position markings. Preserve the removed parts and photographs until the motor corner and acceptance evidence are complete, especially after an impact.

How should propeller markings and positions be verified?
Match the replacement to the exact aircraft model and the documented motor position. DJI systems commonly distinguish propeller directions through markings, rings, molded symbols or installation instructions. The visual pattern is not universal across every series, and a similar diameter does not establish compatibility. Compare the new part number or supported compatibility, the markings on the aircraft or motor, the fastener type and the documented installation sequence.
Lay out the removed and replacement components by position before installation. If the history is unknown, do not infer orientation from the previous installation because it may already be wrong. A unit purchased pre-owned should receive a full identity check rather than a single damaged-blade swap. Reboot Hub records the exact model, supplied propellers, condition and compatible replacement evidence in writing so the customer is not asked to trust an anonymous bag of parts.
What should be inspected after a propeller strike or crash?
A propeller strike can transmit load to the motor shaft, bearings, arm, guard, shell and electrical drive. Keep the aircraft grounded. Inspect the affected corner for motor resistance, axial or radial looseness, debris, contact marks, arm deformation and cracks around mounts. Compare with other corners without using force. If the propeller broke in flight, preserve the event logs and recovered pieces where possible. Do not command a motor start when the shaft, arm or nearby structure may be unsafe.
Replacing the blade does not prove the motor corner is healthy. The written scope should identify confirmed propeller damage, adjacent risks and tests withheld until the structure is safe. Exact board or drive-component findings can be published when a technician has the exact model, relevant board revision and measured case evidence; they cannot be inferred from an external chip alone. This boundary lets useful CPU999 repair experience support diagnosis without turning a specific impact into a universal ESC claim.

How should compatible DJI propellers be installed?
Use the exact-model installation instructions, correct position and supplied or specified hardware. Work on one position at a time if that helps preserve orientation. Seat the hub correctly and apply the documented fastening method. Do not reuse a screw or locking feature that is damaged, contaminated or outside the exact procedure. Keep tools away from camera and sensor surfaces, and do not power the aircraft while hands or tools remain near the propulsion system.
After installation, inspect seating, markings and clear rotation through the safe manual check described for the model. On protected aircraft, verify guard clearance through the full propeller path. Check that folding blades move consistently and that no hardware stands proud. The goal is not merely to attach a new blade. It is to establish an exact, documented mechanical configuration that supports the later startup and flight gates.
What acceptance evidence is needed before flight?
Begin with a visual recheck and confirmation that tools, loose parts and shipping protectors are removed. Place the aircraft in an appropriate open area and observe startup without approaching the propellers. Stop for unusual sound, visible wobble, rubbing, repeated warnings or inconsistent motor behavior. If the exact model provides supported diagnostic information, preserve it. Do not hold the aircraft or conduct an improvised indoor full-power test.
Only after the mechanical and startup gates are clean should a controlled low-risk hover be considered in a legal suitable location. Observe vibration, sound, attitude and control response, then land and reinspect the new propellers and hardware. Written evidence should name the installed parts, positions, checks completed and remaining known and unknown items. A single hover demonstrates a defined acceptance step; it does not promise indefinite propeller life.

How does Reboot Hub remove uncertainty from a propeller decision?
The customer's concern may be a visible chip, a crash, a noise or uncertainty about a pre-owned kit. Reboot Hub records the exact model, propeller markings, condition, supplied spares, event evidence and adjacent motor or arm findings. We disclose parts provenance and what was or was not tested. If a complete aircraft is being considered, the customer can review the Drone Wiki, Reboot Hub Standard and written acceptance path rather than relying on a seller's claim that the props look fine.
For repair, approval should cover the documented replacement and any adjacent inspection required by the event. The customer sees the concern, evidence, action, stop conditions and acceptance in one path. That is stronger for beginners and professional operators alike: no hidden damage is declared absent without evidence, and no unnecessary part is pushed before the exact system and position are understood.
Keep exploring
Further reading
From The Reboot Hub Chronicle



From Drone Guides