Support & Learning / Module 5 branch
Camera, Gimbal and Payload
Before this lesson: Know the exact aircraft and camera, then define the exposure result before choosing density.
What you will understand
- Translate ND labels into stops without treating them as weather prescriptions.
- Verify exact-model mount and gimbal clearance before field use.
- Capture optical and exposure evidence that answers the customer's real shooting concern.
Camera exposure and exact-model fit
A neutral-density filter is not a camera upgrade and it does not improve the sensor. It is a controlled reduction of incoming light that can help the camera hold a chosen shutter, aperture or exposure strategy when the scene is too bright. The useful question is therefore not which brand is best, but which exact filter fits the exact DJI camera, supplies the required number of stops and leaves the gimbal and optical path working normally. This guide starts with the customer's concern, converts it into written evidence and shows how Reboot Hub separates fit, density, polarization, exposure and acceptance without turning one field result into a universal promise.
Quick answer
Set the exposure target first; choose filter density second
Confirm the exact model and camera, the intended frame rate or still-photo method, the ambient light and the exposure setting that cannot be reached without reducing light. ND4 = 2 stops, ND8 = 3 stops, ND16 = 4 stops, ND32 = 5 stops and ND64 = 6 stops. Those values describe light reduction, not a fixed weather recipe. Fit and image behavior must be verified on the exact unit, and case-level evidence must remain attached to that model, lens and shooting condition.
Which decision branch fits the customer's concern?
What evidence should be retained before action?
What does an ND filter actually change on a DJI drone camera?
An ND filter reduces the amount of light reaching the camera. A one-stop reduction halves the light; two stops pass one quarter; three stops pass one eighth. That is why ND4 = 2 stops, ND8 = 3 stops, ND16 = 4 stops, ND32 = 5 stops and ND64 = 6 stops. The label is an optical density relationship. It is not a promise that ND16 belongs to every sunny day or that ND64 always creates cinematic motion. Scene luminance, frame rate, shutter target, aperture where available, ISO and highlight headroom determine the useful density.
The filter does not add dynamic range, create resolution or repair a weak sensor. It can help keep an exposure choice that would otherwise be impossible in bright light, but too much density can force ISO upward or make the live image harder to evaluate. Reboot Hub documents the customer's intended output and the exact camera before recommending a range. The written evidence states what the filter changes, what remains controlled by the camera and what remains unknown until a field test is made.

How should video shutter strategy guide the density choice?
For motion-oriented video, begin with the intended frame rate and motion rendering rather than a filter number. A common creative starting point is a shutter interval near twice the frame interval, but that is an aesthetic convention, not an airworthiness rule and not mandatory for every subject. Confirm whether the scene contains fast subject movement, rapid aircraft movement, water, foliage, buildings or a stabilized hover. Then inspect highlights and ISO before adding density. If the unfiltered camera already holds the desired settings without clipping, an ND filter may not be needed.
After fitting the filter, record the actual shutter, ISO, aperture if adjustable, histogram and an original clip. Do not judge from a compressed phone preview alone. If the scene changes, land in a suitable place before changing the accessory. A documented before-and-after pair is stronger than a generic label such as cloudy or bright sun. Case-level evidence from one Mavic 3 Pro camera and one afternoon remains evidence for that combination; it is not automatically a prescription for a Mini, Air or another lens.
Why is exact-model fit more important than a similar-looking mount?
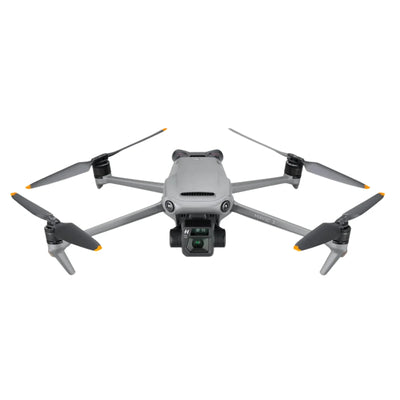
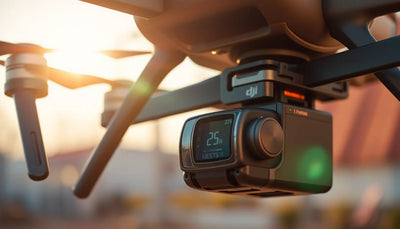
DJI camera modules differ in lens shape, gimbal geometry, startup movement, multi-camera layout and supported accessories. A filter can appear to attach yet seat unevenly, cover the wrong optical path, touch a neighboring camera or add load that changes gimbal behavior. Confirm the aircraft model, camera or lens and the maker's compatibility statement. Inspect the filter ring, locating features, glass and mount before installation. Never force a filter or use an adapter whose retention and gimbal clearance have not been established for the exact model.
With the aircraft powered down, fit the accessory using the documented motion and verify that it sits flush. Then place the aircraft on a stable open surface and observe startup movement without touching the gimbal. Stop if there is rubbing, repeated obstruction, unusual sound, a warning or incomplete movement. The same standard applies to pre-owned accessories: Reboot Hub records the exact kit, condition and fit evidence so the customer can see both known and unknown items before relying on the filter in a project.

How do fixed ND, variable ND and polarized filters differ?
A fixed ND filter provides one stated density and is straightforward to verify. A variable ND changes density through rotating polarization layers, which can be convenient but may create uneven darkening, cross patterns or inconsistent appearance at stronger settings and wide fields of view. A polarizer can reduce some reflections or change sky and foliage appearance, but its effect depends on sun angle, camera direction and the reflective surface. ND/PL filters combine light reduction with that angle-dependent behavior, so orientation becomes part of the evidence.
Do not treat polarization as a universal color or haze correction. Rotate and inspect it on the ground for the actual heading and subject, then record the position if repeatability matters. For mapping, inspection or color-critical work, any directional change in brightness or reflection can affect consistency and should be tested before the mission. The choice belongs to the capture requirement: fixed density for repeatable light reduction, polarization only when its scene-dependent effect is understood, and no filter when the desired exposure is already available.
What changes on dual-camera or triple-camera DJI aircraft?
A multi-camera aircraft can contain different focal lengths, apertures, sensor sizes and physical filter interfaces. A kit may supply individual elements for each camera, a combined mount or support only selected paths. Confirm which camera records the required shot and whether every filter element is correctly seated. Density labels may match while exposure and depth-of-field behavior still differ because the cameras are different. Do not infer that one filter position gives identical image behavior across the full camera system.
Capture a clean reference from each camera path used by the project. Check corners, sharpness, color, flare, reflections and whether switching cameras produces an unexpected exposure jump. If the aircraft reports a gimbal or camera warning, remove the accessory only after safe shutdown and recheck the exact fit. Reboot Hub can document the included filter set with the aircraft, but written findings distinguish verified fit from assumptions about cameras or accessories that were not supplied for inspection.

How should image quality be checked without inventing a filter verdict?
Use clean glass, a stable subject and original files. Compare an unfiltered reference with a filtered frame at settings that make the comparison meaningful. Inspect center and corners for blur, doubled detail, uneven density, color shift, flare and visible contamination. A dark frame is not proof of good density, and an attractive social-media image is not proof of optical consistency. Keep the sun angle and aircraft position as stable as practical, and note if a polarizer was rotated between frames.
Real workshop or field experience can be published when it is bounded. For example, an observed corner softness on one exact filter, camera and mount can justify inspecting that unit and repeating the test; it cannot establish that every filter with the same label is defective. If a repair bench identifies gimbal interference, the conclusion should retain the exact model, accessory identity, observed contact and case-level evidence. This preserves useful experience without converting it into an unsupported brand-wide claim.
What should be checked before takeoff and after landing?
Before takeoff, confirm that the filter is clean, fully retained and clear of every camera and gimbal movement. Start on a stable surface, review warnings and verify live view, recording, horizon and camera switching where applicable. Confirm that the planned density still fits current light. During flight, avoid changing the project merely to justify an over-strong filter. If visibility, histogram or warnings are unsuitable, land and revise the setup rather than forcing the exposure.
After landing, inspect retention and glass, save an original file and record the exposure settings and scene. Store filters so the mounting surfaces and coatings are protected. If the filter was involved in an impact, do not refit cracked glass or a distorted ring. The customer's concern may be creative, mechanical or optical; the final note should state which concern was tested, the evidence obtained and any known and unknown limitations before the next flight.

How does Reboot Hub turn an ND-filter question into a transparent buying path?
A marketplace listing can say compatible without showing the exact camera, actual kit, mount condition or gimbal result. Reboot Hub approaches the same decision from the customer's perspective. We record the aircraft and camera identity, included accessories, visible condition, fit evidence and any relevant test files. Where an accessory was not supplied or a scene was not tested, that unknown is written plainly rather than being replaced with a generic best-filter claim.
For a complete pre-owned camera-drone purchase, the customer can follow the Drone Wiki and model-comparison paths, review the Reboot Hub Standard and ask for written evidence that matches the intended capture work. The purpose is not to sell an ND label. It is to remove the concerns around exact fit, optical condition, included equipment and acceptance so a novice or professional can make a defensible decision.
Keep exploring
Further reading
From The Reboot Hub Chronicle

From Drone Guides