Support & Learning / Module 8 branch
Symptoms, Evidence and Diagnosis
Before this lesson: Drone Repair Complete Guide
What you will understand
- Know what to record, when to stop and when service begins.
- Separate observable evidence from assumptions before choosing an action.
- Continue through the main lesson path or enter a focused topic branch when needed.
DJI Neo 2 exact-unit diagnosis
A compact guarded drone still needs an exact-unit repair decision. After an impact, moisture event, unstable startup or camera concern, preserve what can be observed safely and let diagnosis separate external damage from control, power and imaging symptoms.
Quick answer
Do not judge a DJI Neo 2 repair from the shell alone
Document the full propeller guards, rotors, compact airframe, camera area, battery, warnings and event history before changing anything. Stop when power, heat, battery or structural condition is unsafe, then request a written finding, repair scope and test plan.
DJI Neo 2 · price after diagnosis
No validated public range is available for this model. Share its condition, fault, and photos to receive a written quote.
What should be visible before the customer acts?
What should be recorded after a DJI Neo 2 impact or fault?
Start with the event. Note whether the concern followed a collision, hard landing, moisture exposure, unusual heat, long storage, transport or an earlier repair. Record what the aircraft did immediately afterward and what it does now. Save the wording of app or aircraft warnings and the point in the startup or connection sequence where the symptom appears. Avoid turning a single warning into a confident component diagnosis.
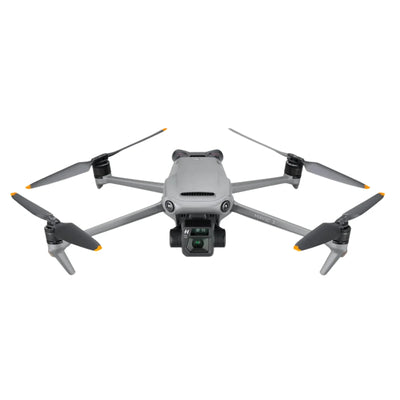
Photograph the aircraft from above, below, front, rear and both sides in good light. Include the full propeller guards, rotor area, compact shell, camera and forward sensing area, battery and supplied case or controller if relevant. Keep the photos as an intake baseline. Do not remove guards or panels simply to create more dramatic repair evidence, and do not force a camera or rotor that does not move normally.
How should the guards, propellers and motors be checked safely?
With the aircraft powered off and the battery removed when safe to do so, look for cracks, deformation, rubbing marks, foreign material and unequal clearances around the full guards and rotors. Compare all four corners rather than focusing only on the point that appears to have been hit. A guard can look intact from above while being distorted near a mounting area, and a rotor can show a small edge change that matters under load.
Do not run the motors to prove they are fine when a propeller, guard or structure is visibly damaged. Do not bend parts back for a quick test. If a rotor does not move freely by gentle observation, if the motor area shows heat or debris, or if the structure may interfere with rotation, stop. A compact aircraft can produce an unsafe result quickly when a small clearance or balance issue is ignored.

What can the camera and sensing area tell you?
Inspect the visible camera housing, lens area and forward sensing region for shift, impact marks, contamination or obstruction. Record whether the camera initializes, whether the image appears stable and whether a warning is present only when that can be observed without forcing the mechanism. A tilted image or startup warning can describe the symptom, but it cannot by itself identify whether the cause is mechanical alignment, a cable, a module or another system.
Avoid touching the lens, gimbal or sensing windows with tools. Clean only according to appropriate product guidance and do not use a cosmetic improvement to hide the original condition before diagnosis. If the camera area was struck, the repair decision should include structural context and post-repair imaging checks, not only whether a picture appears on a screen.
How should battery, power and moisture concerns be separated?
Battery condition is a safety gate. A swollen, leaking, damaged, unusually hot or chemically odorous battery should not be charged, shipped or repeatedly inserted as if it were a normal diagnostic accessory. Record which battery was in use and whether the symptom follows one battery or appears more broadly, but do not expose the aircraft to repeated power cycles when heat, liquid or unstable startup is present.
Moisture history needs to be disclosed even when the shell later looks dry. Water or condensation can affect more than the first visible symptom, and an immediate successful startup does not prove that the unit is healthy. Keep the event timing and storage steps in the case record. Diagnosis should define what can be checked safely and whether broader uncertainty changes the repair-versus-replacement decision.
What should a written DJI Neo 2 diagnosis and quote contain?
The written finding should connect the reported event and observed symptom to the inspection evidence. It should state what is confirmed, what remains uncertain, the proposed repair level, the parts path, the testing included and any condition that could expand or stop the scope. The customer should not have to infer whether a guard, motor, camera module, shell section or broader assembly is being addressed.
Approval should refer to that scope. If later inspection reveals wider damage, the revised evidence should return to the customer before extra work proceeds. A meaningful quote is not a generic Neo 2 number; it is the decision record for that exact aircraft and kit. If the scope cannot be bounded or the repaired result cannot be demonstrated responsibly, an exact replacement comparison may be the better path.

When is repair stronger than replacement?
Repair is easier to justify when the fault is bounded, the remaining structure and systems are in useful condition, parts and testing are available, and the aircraft still fits the customer's intended use. Keeping the known unit may preserve a familiar kit and reduce setup changes. That advantage only exists when the evidence supports a reliable repair rather than a cosmetic fix around wider uncertainty.
Replacement becomes more attractive when structural, moisture or multi-system damage is broad, the required result cannot be verified, parts are unavailable or downtime matters more than preserving the original unit. Compare against an exact available aircraft with its battery, supplied equipment, condition evidence, known history, grading, written warranty and delivery terms. A generic listing price is not a complete replacement path.
How does Reboot Hub handle the repair decision?
Reboot Hub works from the customer's point of view: identify the concerns that should be removed before commitment, show the evidence available on the exact unit, state the unknowns and put the repair or replacement boundary in writing. Repair work normally takes 1-3 business days after quote approval, separate from inbound transit, parts availability and return transit.
If repair is approved, the diagnostic fee becomes a service credit toward eligible labor or service charges under the written limits. If declined, the diagnostic fee covers inspection and Reboot Hub pays return shipping. Eligible completed repair work has a 30-day repair warranty. Qualifying complete pre-owned products have a separate 180-day product warranty. These are different promises and should remain visibly separate.
What should happen before a repaired Neo 2 returns to flight?
Review the repair record and confirm that the returned aircraft, battery and supplied kit match the intake record. Inspect for transit damage. Check the repaired area, guard and rotor clearances, camera behavior, power and connection state in a safe environment. The post-repair test should address the original complaint and the work performed, while noting any boundary that could not be tested on the bench.
Do not treat a successful startup as permission for an immediate demanding flight. Current product guidance, the operating environment and local requirements still apply. A careful return-to-service plan begins with controlled ground observations and stops if heat, unstable power, abnormal motor behavior, structural concern or a repeated warning appears. Keep the diagnosis, approval, test record and warranty terms together for future support.
Neo 2 teardown: recognize the systems before opening anything
Evidence reviewed 5 September 2026. A teardown can expose displacement, damaged mounts, contamination and connections. A photograph cannot prove electrical continuity, calibration or a board diagnosis. Owner documentation stops at the exterior: power off, disconnect charging, and remove the battery only when safe. Leave structural opening, internal connectors and board work to a qualified technician.
Use the Neo 2 labels, not a first-generation Neo layout: four guarded propeller/motor positions; a two-axis tilt/roll gimbal; separate omnidirectional monocular vision, forward-facing LiDAR and downward infrared; and the battery bay. The optional DJI Neo 2 Digital Transceiver is needed for the supported controller/goggles path. The filming lens and sensing windows are not interchangeable diagnostic targets. Sources: DJI Neo 2 manual v1.2, pages 15-17 and 67; DJI Neo 2 specifications.
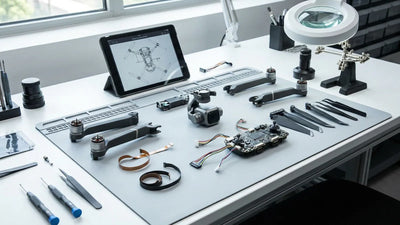
Workshop scope: the privately reviewed training images are older Mini/Mavic examples, not a verified Neo 2 teardown or a Neo 2 failure-rate study. Their useful lesson is to record co-occurring symptoms: an apparent gimbal fault can involve connections or another subsystem. The matrix below applies that diagnostic method to DJI-documented Neo 2 systems; it does not transplant older boards, error codes or repair procedures into this model.
| Observed symptom | Systems to distinguish | Safe evidence to retain | What this does not prove |
|---|---|---|---|
| Guard contact, scraping or uneven rotor clearance after impact | Guard, propeller, motor mounting and airframe geometry | Battery out if safe: photograph all four corners at the same angles, including underside and rub marks. Do not bend, spin-test or straighten parts. | A mark shows contact, not whether the guard alone or its supporting structure moved. |
| Tilted image, gimbal warning or absent initialization | Two-axis gimbal, camera, mounting and interconnections | Record existing warning text and whether saved footage also tilts. Photograph protector state, camera position and impact direction without forcing movement. | A gimbal warning does not identify a failed camera. A missing self-check plus other warnings requires wider system diagnosis. |
| Obstacle warning, poor hold or unexpected braking | Monocular vision, forward LiDAR, downward infrared, positioning/control | Record direction, mode, light, surface texture and GNSS indication from the original event. Photograph each visible sensing window; keep camera-lens dirt distinct from sensor-window obstruction. | Glass, weak texture or unavailable sensing can resemble a hardware issue. Never test avoidance by flying toward an obstacle. |
| Mobile connection works but RC/goggles connection does not | Control method, Digital Transceiver, antenna and radio link | Record the exact controller/goggles, whether the Neo 2 Digital Transceiver is fitted, and pre-existing connection messages. Photograph its exterior and antenna while unpowered. | Different connection paths test different hardware. Mobile Wi-Fi success does not establish transceiver health; radio linking is not account binding. |
| Live image present but recording/export fails | Camera recording, internal storage and transfer path | Keep one existing original file, its playback result and the app message. Neo 2 uses internal storage, not a microSD card; identify QuickTransfer versus USB transfer. | A preview is not proof a file was saved. A phone-transfer fault is not by itself a camera-module failure. |
| No start, shutdown or charging concern | Battery, battery seating, USB/hub path and aircraft power | Keep the battery identity, existing LED pattern, charger/cable and event history. Photograph the bay and external contacts without tools; do not charge or repeatedly power a damaged unit. | A charging light does not establish load capability. Liquid, swelling, smell or abnormal heat ends owner testing. |
DJI confirms the transceiver requirement and separate control methods in its Neo 2 beginner guide. Its file-export guide confirms Neo 2 has 49 GB of built-in storage and no microSD support. A transceiver or USB connection is not electrically unpowered merely because the motors are stopped; do not attach accessories to a suspect unit as a diagnostic experiment.
A useful unpowered intake record
- Label the aircraft, battery and supplied controller/goggles privately. Write a short event timeline and keep the original warning screenshots and existing files before edits or cleanup.
- Take matching top, bottom, front, rear and side photographs. Identify each damaged corner and each affected window separately, so the technician can compare geometry instead of interpreting a single close-up.
- Record what was not tested because of damage. A battery that cannot be removed safely, a crushed mount, liquid history or heat concern is a stop condition, not a reason to force a demonstration.
After repair: prove the original complaint was addressed
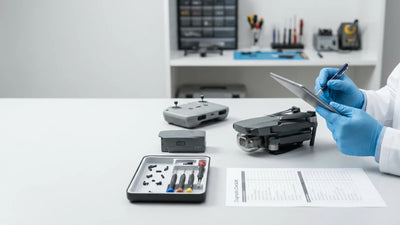
Ask for a test record identifying the returned serial, repair scope, configuration, result and any untested boundary. Powered checks below belong to the service team or a cleared, fully assembled aircraft, never an open-board exercise.
- Guard or propulsion work: document restored clearances and secure assembly, then the service team's controlled propulsion result. A clean shell photograph is insufficient.
- Camera work: compare a stationary level-scene recording and the actual exported file, alongside normal gimbal initialization. Keep live-view and recorded-image results separate.
- Sensing or control work: record clean, unobstructed windows, resolved warnings and the exact mode/lighting used for verification. No collision challenge or indoor range claim.
- Connection work: verify the actual supplied control method, transceiver configuration and app status. Recheck applicable account/controller relationships after replacement or repair.
- Power or storage work: identify the battery and charge path tested; confirm stable operation without abnormal heat. Record, export and play a short test clip if storage or camera behavior was the complaint.
These are acceptance questions, not measured Neo 2 workshop results. DJI's maintenance and post-flight guidance, pages 94-96 requires damage inspection and escalation. A short bench test does not clear every flight mode. Only proceed to a lawful, controlled return-to-flight check after the safety gate passes; stop for renewed warnings.
Parts and repair-versus-replacement
Ask whether the finding is limited to a replaceable exterior item or involves camera alignment, sensing, power or structural uncertainty. Compare a written, testable repair scope with an exact replacement kit. No universal repair price, success rate or service-time estimate follows from this matrix.
Use the Neo 2 Wiki and parts reference. Verified existing item pages include the Neo 2 propeller guard, Neo 2 battery and Neo 2 charging hub; a listing is not a diagnosis, a stock promise or proof an internal assembly is interchangeable.
Return to Module 8: repair evidence and decisions, review the professional repair process, send the intake record, and use the pre-flight go/no-go checklist after service.
Keep exploring
Further reading
From The Reboot Hub Chronicle


From Drone Guides