Apoio e aprendizagem / ramo do módulo 8
Sintomas, provas e diagnóstico
Antes desta lição: Guia completo de reparação de drones
O que vai compreender
- Saiba o que registar, quando parar e quando começa a assistência.
- Distinga provas observáveis de suposições antes de escolher uma ação.
- Continue pelo percurso principal da lição ou consulte um ramo temático específico, se necessário.
Diagnóstico da unidade específica DJI Neo 2
Mesmo um drone compacto com proteções precisa de uma decisão de reparação baseada na unidade específica. Após um impacto, contacto com humidade, arranque instável ou problema na câmara, preserve o que possa ser observado em segurança e deixe que o diagnóstico distinga danos externos de sintomas de controlo, alimentação e imagem.
Resposta rápida
Não avalie a reparação de um DJI Neo 2 apenas pela carcaça
Registe o estado de todas as proteções das hélices, rotores, estrutura compacta, zona da câmara, bateria, avisos e histórico do incidente antes de alterar seja o que for. Pare se a alimentação, temperatura, bateria ou estrutura não oferecer segurança e, em seguida, solicite uma avaliação por escrito, o âmbito da reparação e um plano de testes.
DJI Neo 2 · preço após diagnóstico
Não existe um intervalo de preços público validado para este modelo. Envie informações sobre o estado, a avaria e fotografias para receber um orçamento por escrito.
O que deve ser observado antes de o cliente agir?
O que deve ser registado após um impacto ou uma avaria no DJI Neo 2?
Comece pelo incidente. Indique se o problema surgiu após uma colisão, uma aterragem brusca, exposição à humidade, calor invulgar, armazenamento prolongado, transporte ou uma reparação anterior. Registe o comportamento da aeronave logo a seguir e o que faz agora. Guarde o texto dos avisos na aplicação ou na aeronave e indique em que momento do arranque ou da sequência de ligação surge o sintoma. Não transforme um único aviso num diagnóstico definitivo de um componente.
Fotografe o drone de cima, de baixo, de frente, de trás e de ambos os lados, com boa iluminação. Inclua as proteções das hélices na totalidade, a área dos rotores, a estrutura compacta, a câmara e a zona de sensores frontais, a bateria e a caixa ou o comando fornecidos, se for relevante. Guarde as fotografias como registo inicial da receção. Não retire proteções nem painéis apenas para criar provas de reparação mais dramáticas e não force uma câmara ou um rotor que não se mova normalmente.
Como verificar as proteções, as hélices e os motores em segurança?
Com o drone desligado e a bateria removida, quando for seguro fazê-lo, procure fissuras, deformações, marcas de fricção, materiais estranhos e folgas desiguais em toda a extensão das proteções e dos rotores. Compare os quatro cantos em vez de se concentrar apenas no ponto que parece ter sofrido o impacto. Uma proteção pode parecer intacta vista de cima e estar deformada junto a uma zona de fixação; uma hélice pode apresentar uma pequena alteração na extremidade que seja relevante sob carga.
Não ligue os motores para provar que estão em boas condições se uma hélice, proteção ou estrutura apresentar danos visíveis. Não tente endireitar peças para fazer um teste rápido. Se um rotor não se mover livremente numa observação suave, se a área do motor apresentar sinais de calor ou detritos, ou se a estrutura puder interferir com a rotação, pare. Um drone compacto pode rapidamente tornar-se perigoso se forem ignorados pequenos problemas de folga ou equilíbrio.

O que podem revelar a câmara e a zona de sensores?
Inspecione a caixa visível da câmara, a zona da lente e a área de sensores frontais para detetar desalinhamentos, marcas de impacto, sujidade ou obstruções. Registe se a câmara inicia, se a imagem parece estável e se é apresentado algum aviso, mas apenas quando isso puder ser observado sem forçar o mecanismo. Uma imagem inclinada ou um aviso no arranque podem descrever o sintoma, mas, por si só, não permitem identificar se a causa está no alinhamento mecânico, num cabo, num módulo ou noutro sistema.
Evite tocar na lente, no gimbal ou nas janelas dos sensores com ferramentas. Limpe apenas de acordo com as orientações adequadas do produto e não tente melhorar o aspeto para ocultar o estado original antes do diagnóstico. Se a área da câmara tiver sofrido um impacto, a decisão de reparação deve ter em conta o contexto estrutural e incluir verificações de imagem após o reparo, e não apenas confirmar se aparece uma imagem no ecrã.
Como distinguir problemas de bateria, alimentação e humidade?
O estado da bateria é um critério de segurança. Uma bateria inchada, com fugas, danificada, invulgarmente quente ou com odor a químicos não deve ser carregada, enviada nem inserida repetidamente como se fosse um acessório normal de diagnóstico. Registe qual a bateria utilizada e se o sintoma se verifica apenas com uma bateria ou de forma mais generalizada, mas não submeta o drone a ciclos de alimentação repetidos se houver calor, líquido ou um arranque instável.
O histórico de exposição à humidade deve ser comunicado mesmo que a estrutura pareça seca mais tarde. A água ou a condensação podem afetar mais do que o primeiro sintoma visível, e um arranque imediato bem-sucedido não prova que o equipamento esteja em boas condições. Registe a data e a hora do incidente e as medidas de armazenamento no processo. O diagnóstico deve definir o que pode ser verificado em segurança e se uma incerteza mais ampla altera a decisão entre reparar e substituir.
O que deve incluir um diagnóstico e orçamento por escrito para o DJI Neo 2?
O parecer escrito deve relacionar o incidente comunicado e o sintoma observado com as evidências da inspeção. Deve indicar o que está confirmado, o que permanece incerto, o nível de reparação proposto, a origem das peças, os testes incluídos e quaisquer condições que possam alargar ou interromper o âmbito do trabalho. O cliente não deve ter de deduzir se a intervenção abrange uma proteção, um motor, um módulo de câmara, uma secção da carcaça ou um conjunto mais amplo.
A aprovação deve referir-se a esse âmbito. Se uma inspeção posterior revelar danos mais extensos, as evidências atualizadas devem ser apresentadas ao cliente antes de avançar com trabalho adicional. Um orçamento útil não é um valor genérico para o Neo 2; é o registo da decisão para aquela aeronave e respetivo kit. Se não for possível delimitar o âmbito ou demonstrar de forma responsável o resultado da reparação, poderá ser preferível comparar com uma substituição exata.

Quando é que reparar é uma opção mais sólida do que substituir?
É mais fácil justificar a reparação quando a avaria está delimitada, a estrutura e os sistemas restantes estão em condições úteis, há peças e testes disponíveis e a aeronave continua adequada à utilização pretendida pelo cliente. Manter a unidade conhecida pode preservar um kit familiar e reduzir alterações à configuração. Esta vantagem só existe quando as evidências sustentam uma reparação fiável, em vez de uma solução cosmética que deixa incertezas mais amplas por resolver.
A substituição torna-se mais atrativa quando os danos estruturais, causados por humidade ou em vários sistemas são extensos, não é possível verificar o resultado necessário, as peças estão indisponíveis ou o tempo de imobilização pesa mais do que manter a unidade original. Compare com uma aeronave concreta disponível, incluindo a bateria, o equipamento fornecido, as evidências sobre o estado, o historial conhecido, a classificação, a garantia por escrito e as condições de entrega. O preço de um anúncio genérico não representa uma solução completa de substituição.
Como trata a Reboot Hub a decisão de reparar?
A Reboot Hub trabalha na perspetiva do cliente: identifica as questões que devem ser esclarecidas antes de assumir um compromisso, apresenta as evidências disponíveis sobre a unidade concreta, indica as incógnitas e define por escrito os limites entre reparação e substituição. A reparação demora normalmente 1-3 dias úteis após a aprovação do orçamento, sem contar com o transporte de ida, a disponibilidade de peças e o transporte de regresso.
Se a reparação for aprovada, a taxa de diagnóstico converte-se num crédito de serviço para mão de obra ou encargos de serviço elegíveis, dentro dos limites indicados por escrito. Se for recusada, a taxa de diagnóstico cobre a inspeção e a Reboot Hub paga o envio de regresso. Os trabalhos de reparação concluídos que cumpram os requisitos têm uma garantia de reparação de 30 dias. Os produtos usados completos que cumpram os requisitos têm uma garantia de produto separada de 180 dias. São compromissos diferentes e devem permanecer claramente separados.
O que deve acontecer antes de o Neo 2 reparado voltar a voar?
Consulte o registo da reparação e confirme que a aeronave devolvida, a bateria e o kit fornecido correspondem ao registo de entrada. Verifique se ocorreram danos durante o transporte. Inspecione a área reparada, as folgas das proteções e dos rotores, o funcionamento da câmara, a alimentação e o estado da ligação, num ambiente seguro. O teste após a reparação deve incidir sobre a reclamação original e o trabalho realizado, assinalando quaisquer aspetos que não tenham sido possíveis testar em bancada.
Não interprete um arranque bem-sucedido como autorização para um voo exigente imediato. As orientações atuais do produto, o ambiente de operação e os requisitos locais continuam a aplicar-se. Um plano cuidadoso para voltar a colocar o equipamento em serviço começa com observações controladas no solo e é interrompido se surgir calor, alimentação instável, comportamento anormal dos motores, preocupação estrutural ou um aviso repetido. Guarde juntos o diagnóstico, a aprovação, o registo do teste e as condições da garantia para futuras necessidades de assistência.
Desmontagem do Neo 2: identifique os sistemas antes de abrir o equipamento
Evidência analisada em 5 de setembro de 2026. A desmontagem pode revelar deslocamentos, suportes danificados, contaminação e ligações. Uma fotografia não comprova a continuidade elétrica, a calibração ou um diagnóstico da placa. O proprietário deve limitar o registo do estado do equipamento ao exterior: desligue o equipamento, desligue o cabo de carregamento e retire a bateria apenas quando for seguro fazê-lo. Deixe a abertura estrutural, os conectores internos e os trabalhos na placa a cargo de um técnico qualificado.
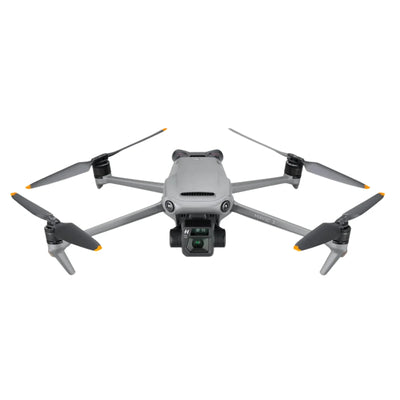
Use a disposição dos elementos do Neo 2, não a do Neo de primeira geração: quatro posições de hélice/motor com proteção; um gimbal de inclinação/rolagem de dois eixos; sistemas distintos de visão monocular omnidirecional, LiDAR frontal e infravermelhos inferiores; e o compartimento da bateria. O DJI Neo 2 Digital Transceiver opcional é necessário para a ligação compatível com o comando/óculos. A lente de filmagem e as janelas dos sensores não são elementos de diagnóstico intermutáveis. Fontes: manual do DJI Neo 2 v1.2, páginas 15-17 e 67; especificações do DJI Neo 2.
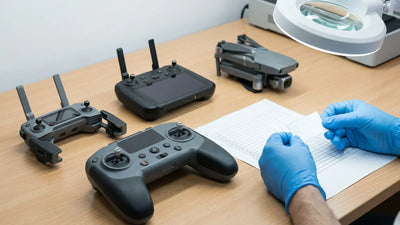
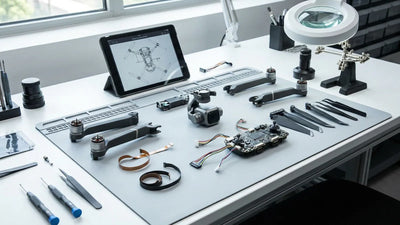
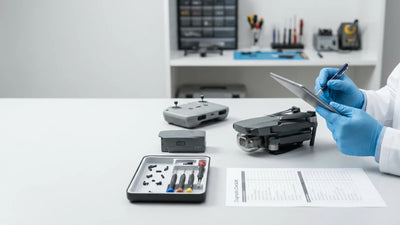
Âmbito da oficina: as imagens de formação analisadas em privado são exemplos antigos de Mini/Mavic, não uma desmontagem verificada do Neo 2 nem um estudo da taxa de avarias do Neo 2. A lição útil é registar sintomas que ocorram em simultâneo: uma aparente falha do gimbal pode envolver ligações ou outro subsistema. A matriz abaixo aplica esse método de diagnóstico aos sistemas do Neo 2 documentados pela DJI; não transpõe para este modelo placas, códigos de erro ou procedimentos de reparação antigos.
| Sintoma observado | Sistemas a distinguir | Elementos seguros a conservar | O que isto não comprova |
|---|---|---|---|
| Contacto com a proteção, raspagem ou folga irregular do rotor após um impacto | Proteção, hélice, montagem do motor e geometria da estrutura | Retire a bateria, se for seguro: fotografe os quatro cantos a partir dos mesmos ângulos, incluindo a parte inferior e as marcas de fricção. Não dobre, não teste rodando as peças e não as tente endireitar. | Uma marca mostra que houve contacto, mas não indica se apenas a proteção se deslocou ou se a estrutura que a suporta também se moveu. |
| Imagem inclinada, aviso do gimbal ou ausência de inicialização | Gimbal de dois eixos, câmara, montagem e interligações | Registe o texto do aviso existente e se os vídeos guardados também apresentam inclinação. Fotografe o estado do protetor, a posição da câmara e a direção do impacto, sem forçar qualquer movimento. | Um aviso do gimbal não identifica uma avaria na câmara. A ausência do autoteste, juntamente com outros avisos, exige um diagnóstico mais abrangente do sistema. |
| Aviso de obstáculos, dificuldade em manter a posição ou travagem inesperada | Visão monocular, LiDAR frontal, infravermelhos inferiores, posicionamento/controlo | Registe a direção, o modo, a luminosidade, a textura da superfície e a indicação GNSS do evento original. Fotografe cada janela de sensor visível; distinga sujidade na lente da câmara de obstruções nas janelas dos sensores. | Vidro, textura insuficiente ou sensores indisponíveis podem parecer um problema de hardware. Nunca teste a prevenção de obstáculos voando na direção de um obstáculo. |
| A ligação ao telemóvel funciona, mas a ligação ao comando/óculos não | Método de controlo, Digital Transceiver, antena e ligação rádio | Registe o modelo exato do comando/óculos, se o Neo 2 Digital Transceiver está instalado e as mensagens de ligação já existentes. Fotografe o exterior e a antena com o equipamento desligado. | Diferentes métodos de ligação testam componentes de hardware diferentes. O sucesso da ligação Wi-Fi ao telemóvel não confirma o estado do transceiver; a ligação rádio não é o mesmo que a associação à conta. |
| A imagem em direto está disponível, mas a gravação/exportação falha | Gravação da câmara, armazenamento interno e método de transferência | Guarde um ficheiro original existente, o resultado da reprodução e a mensagem da aplicação. O Neo 2 usa armazenamento interno, não um cartão microSD; identifique se a transferência foi feita por QuickTransfer ou USB. | Uma pré-visualização não prova que o ficheiro foi guardado. Uma falha na transferência para o telemóvel não significa, por si só, que o módulo da câmara esteja avariado. |
| Não liga, desliga-se ou há problemas de carregamento | Bateria, encaixe da bateria, ligação USB/hub e alimentação da aeronave | Guarde a identificação da bateria, o padrão LED existente, o carregador/cabo e o historial do evento. Fotografe o compartimento e os contactos externos sem usar ferramentas; não carregue nem ligue repetidamente uma unidade danificada. | Uma luz de carregamento não confirma que a bateria consegue fornecer energia sob carga. Líquido, inchaço, cheiro ou calor anormal são motivos para interromper os testes pelo utilizador. |
A DJI confirma o requisito do transceiver e os métodos de controlo separados no seu guia para principiantes do Neo 2. O seu guia de exportação de ficheiros confirma que o Neo 2 tem 49 GB de armazenamento integrado e não suporta microSD. Uma ligação ao transceiver ou USB não fica sem alimentação elétrica só porque os motores estão parados; não ligue acessórios a uma unidade suspeita como experiência de diagnóstico.
Um registo útil da receção com o equipamento desligado
- Identifique discretamente a aeronave, a bateria e o comando/óculos fornecidos. Escreva uma breve cronologia do evento e guarde capturas de ecrã dos avisos originais e os ficheiros existentes antes de fazer alterações ou limpeza.
- Tire fotografias correspondentes da parte superior, inferior, frontal, traseira e laterais. Identifique cada canto danificado e cada janela afetada em separado, para que o técnico possa comparar a geometria em vez de interpretar um único grande plano.
- Registe o que não foi testado devido a danos. Uma bateria que não possa ser removida em segurança, um suporte esmagado, histórico de contacto com líquidos ou uma preocupação relacionada com calor são motivos para parar, não para forçar uma demonstração.
Após a reparação: confirme que a avaria original foi resolvida
Peça um registo de testes que identifique o número de série devolvido, o âmbito da reparação, a configuração, o resultado e quaisquer aspetos não testados. As verificações com o equipamento ligado abaixo devem ser realizadas pela equipa de assistência ou numa aeronave totalmente montada e autorizada para o efeito, nunca com a placa exposta.
- Trabalho nos protetores ou na propulsão: documente as folgas repostas e a montagem segura; em seguida, registe o resultado do teste de propulsão controlado pela equipa de assistência. Uma fotografia de uma carcaça limpa não é suficiente.
- Trabalho na câmara: compare uma gravação de uma cena estática e nivelada com o ficheiro exportado efetivo, juntamente com a inicialização normal do estabilizador. Registe separadamente os resultados da imagem em direto e da imagem gravada.
- Trabalho nos sensores ou nos controlos: registe que as janelas estão limpas e desobstruídas, que os avisos foram resolvidos e o modo e as condições de iluminação exatos usados na verificação. Não faça testes de colisão nem alegue um alcance em interiores.
- Trabalho na ligação: verifique o método de controlo efetivamente fornecido, a configuração do transceptor e o estado da aplicação. Volte a verificar as associações aplicáveis da conta e do comando após a substituição ou reparação.
- Trabalho na alimentação ou no armazenamento: identifique a bateria e o circuito de carregamento testados; confirme um funcionamento estável, sem calor anormal. Se a avaria dizia respeito ao armazenamento ou à câmara, grave, exporte e reproduza um breve vídeo de teste.
Estas são perguntas de aceitação, não resultados de testes realizados numa oficina com o Neo 2. As orientações de manutenção e pós-voo da DJI, páginas 94-96 exigem a inspeção de danos e o encaminhamento para assistência. Um breve teste em bancada não valida todos os modos de voo. Só avance para uma verificação de voo controlada e legal após passar a verificação de segurança; pare se os avisos voltarem a surgir.
Peças e decisão entre reparar e substituir
Pergunte se a avaria se limita a uma peça exterior substituível ou se envolve o alinhamento da câmara, os sensores, a alimentação ou incertezas estruturais. Compare um âmbito de reparação por escrito e suscetível de verificação com um kit de substituição exato. Esta tabela não permite inferir um preço de reparação, uma taxa de sucesso ou um prazo de assistência universais.
Consulte a Wiki do Neo 2 e a referência de peças. As páginas de produtos existentes e verificadas incluem o protetor de hélices do Neo 2, a bateria do Neo 2 e o hub de carregamento do Neo 2; a existência de uma página não confirma um diagnóstico, a disponibilidade em stock nem a compatibilidade de um conjunto interno.
Volte ao Módulo 8: provas e decisões de reparação, consulte o processo de reparação profissional, envie o registo de entrada do equipamento para reparação e, após a assistência, use a lista de verificação pré-voo go/no-go.
Keep exploring
Further reading
From A Crônica Reboot Hub

From Guias de drones